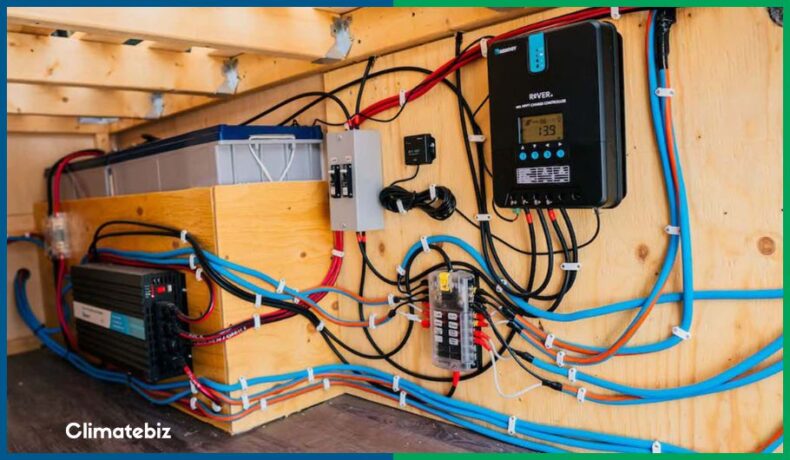
Installing an RV inverter is a great way to give your RV extra power when it needs it most. By adding an inverter, you’ll be able to run more appliances and devices while on the road. For this reason, it’s vital that you know how to follow the correct processes before you install your RV inverter.
In this post, we walk you through the installation process step-by-step to help you get your new inverter up and running in no time!
Table of Contents
Tools Needed To Install An RV Inverter
Installing an RV inverter is a great way to ensure you have a reliable power source while on the road. Here are the tools you’ll need to get the job done:
| Tool | Purpose | Product Link |
|---|---|---|
 | A drill to create holes for mounting the inverter according to the manufacturer’s specifications. | View On Amazon |
 | A socket set to secure the terminals and connect the inverter to the RV’s electrical system. | View On Amazon |
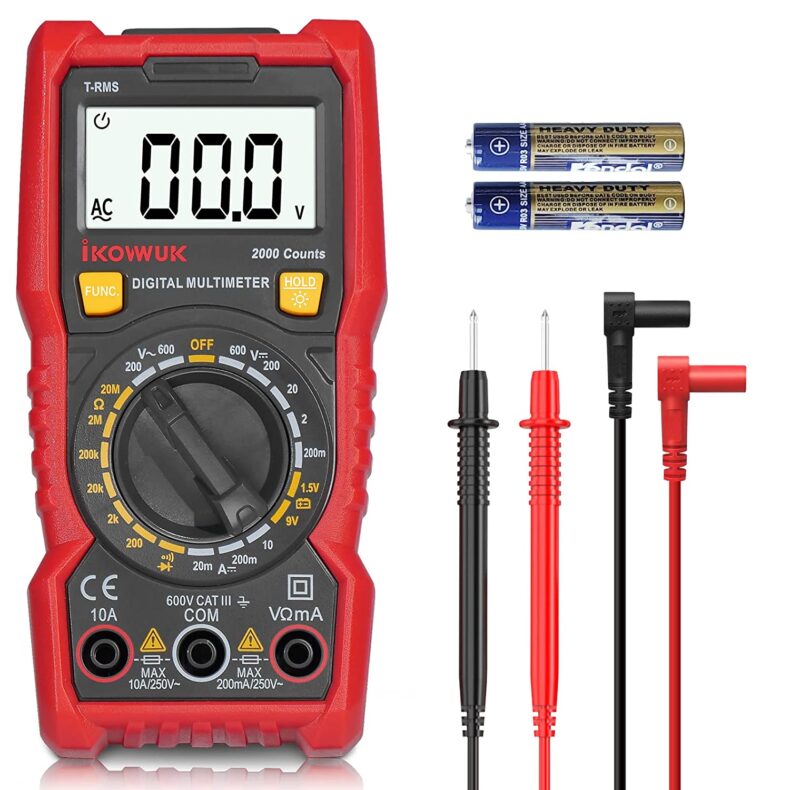 | A multimeter to test the voltage and current of the RV’s electrical system as well as the inverter itself. | View On Amazon |
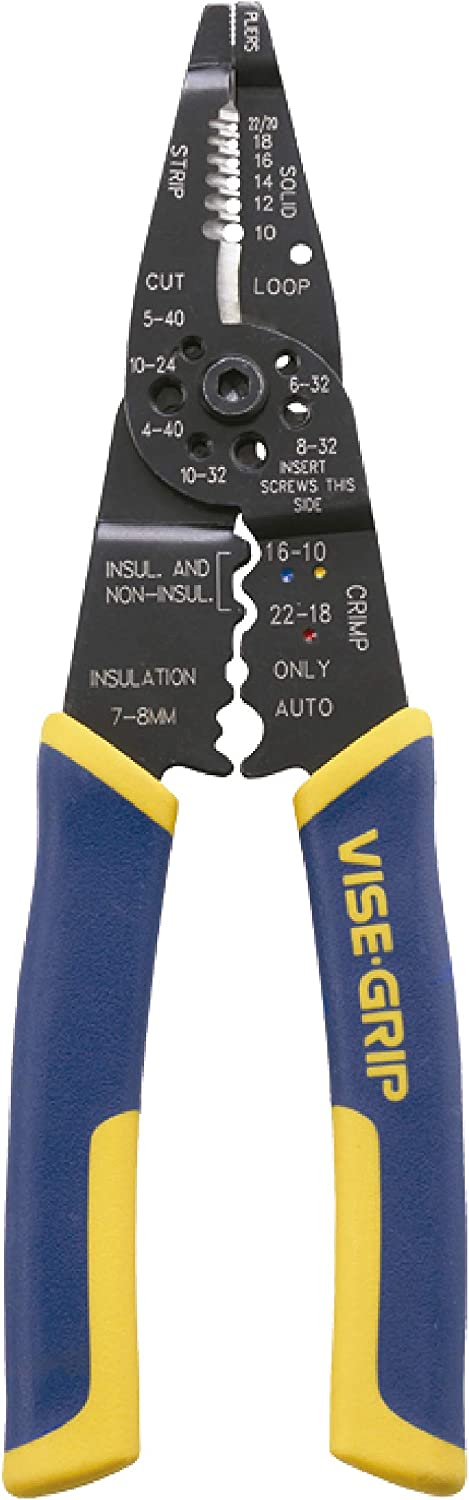 | Wire cutters/strippers to cut the wires that connect the inverter to the RV’s electrical system and strip the insulation off of the wires that connect the inverter to the RV’s electrical system. | View On Amazon |
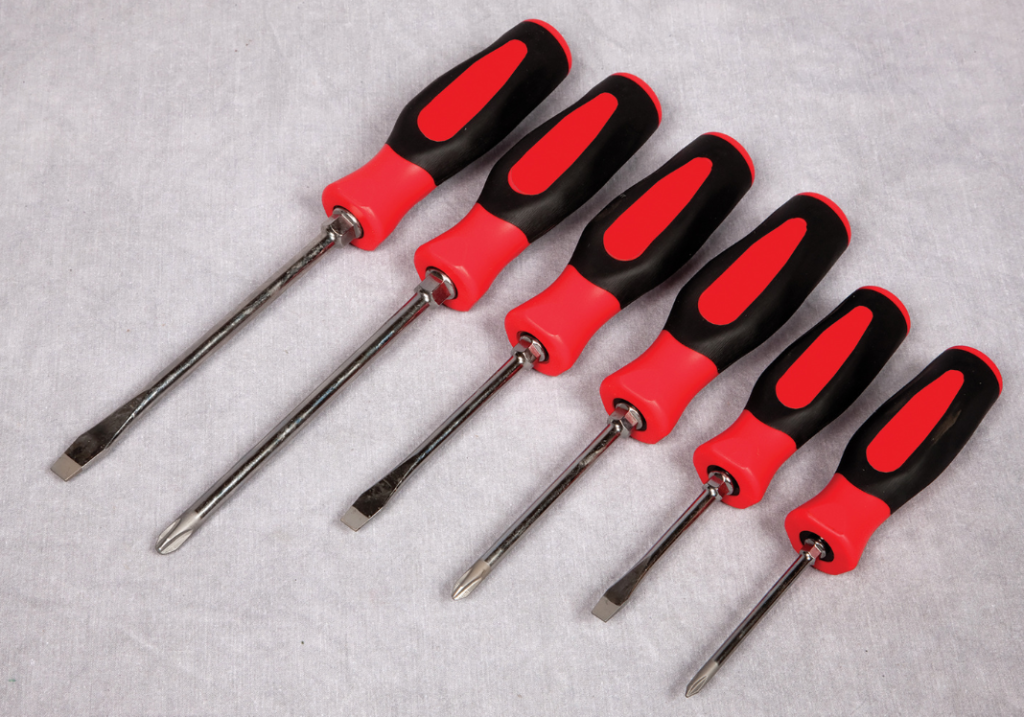 | Screwdrivers to properly secure the inverter and its wiring. | View On Amazon |
How To Install An RV Inverter
Step 1. Find A Suitable Location
First off, it’s critical that you install your RV inverter in a cool, dry, and well-ventilated area. Gas can accumulate, and there’s always the risk of an explosion!
Moreover, heat can significantly affect the performance of electronic equipment, so ensure that the fans are not blocked or exposed directly to the sun.
It’s also essential that you install your RV inverter in a location far away from flammable materials or liquids. This not only protects against the risk of fire but also ensures your and your family’s safety.
Find a position close to the battery bank to prevent excessive voltage drop. Achieve this by using adequately sized wiring from the battery bank to the inverter.
Note to our readers: do not install the inverter in the same compartment as the battery bank. This could potentially create a fire hazard.
Now that you’ve established an appropriate area for installation, it’s time to ground your inverter.
Do so by firmly connecting it to the grounding system of your RV or by using an earth ground. Keep the inverter away from any electronic equipment that may be sensitive to electromagnetic interference. This will prevent potential damage or interference to those devices.
Step 2. Wiring Preparation
Before installing your RV inverter, ensure it’s turned off. This will help avoid any electrical mishaps and save time in installation!
Next, remove the terminal cover by unscrewing the appropriate terminals.
Note to our readers: when hiring an electrician, ensure they have the proper certification and experience. Hiring someone who doesn’t meet these standards could result in costly repairs or potential hazards to your family’s safety!
Wire-wise, one way to make your solar installation more efficient is by using thicker, higher-quality wires between each component. This will help minimize losses and improve performance overall.
| Specification | Minimum Recommended Wire Guage | Maximum Current |
|---|---|---|
| Battery Wiring | 2AWG | 120A |
| PV Wiring | 8AWG | 50A |
| AC Input Wiring | 8AWG | 40A Max Bypass |
| AC Output Wiring | 8AWG | 30A Continuous 40A Max Bypass |
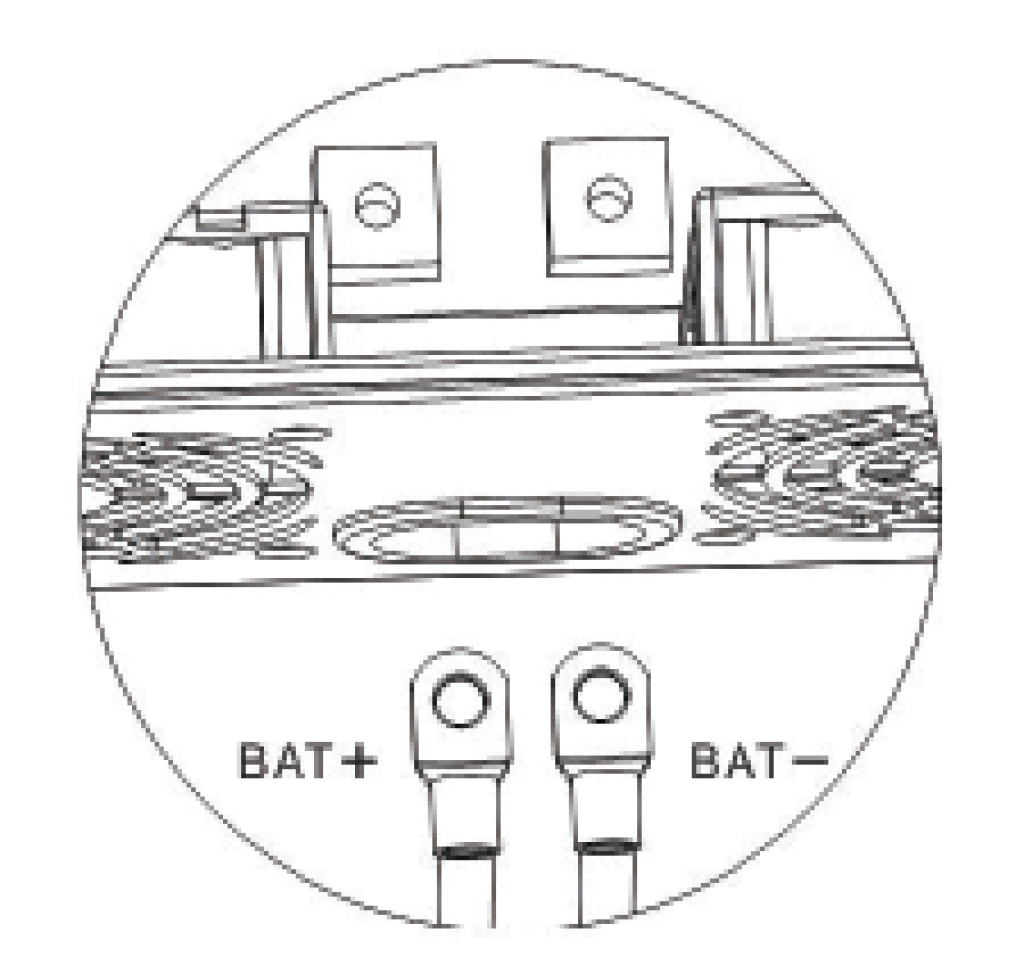
Step 3. Wiring The Battery
Secure the terminals correctly and connect them tightly. Proper tightening prevents excessive heat or resistance in the electrical wiring.
Source: Renogy
Always disconnect the RV from any power sources before beginning the installation. Additionally, ensure that the positive and negative battery ring terminals link to the corresponding positive and negative terminals on the inverter.
Note to our readers: before you begin the installation process, it’s important that you identify and connect the appropriate positive and negative poles. Reversing these poles can permanently damage your RV inverter.
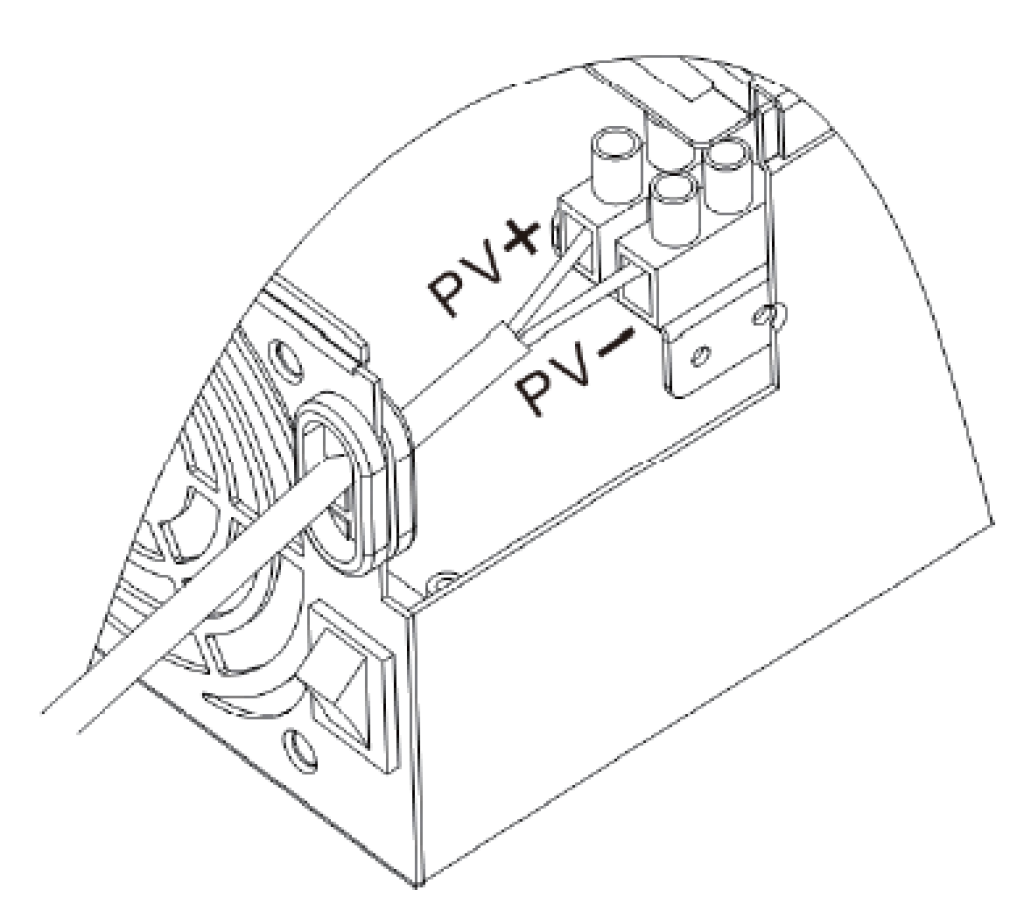
Step 4. Wiring The Solar Panel Input
Use a combiner box when connecting multiple panels in parallel. Not only does this ensure safety, but it also helps with organization and maintenance.
Additionally, ensure you do not exceed the maximum DC input the inverter is rated at, and take note of the required battery voltage input to operate the inverter.
Next, connect your solar panels’ positive and negative wires to their corresponding terminals on the inverter. Make sure all connections are secure before proceeding.
Source: Renogy
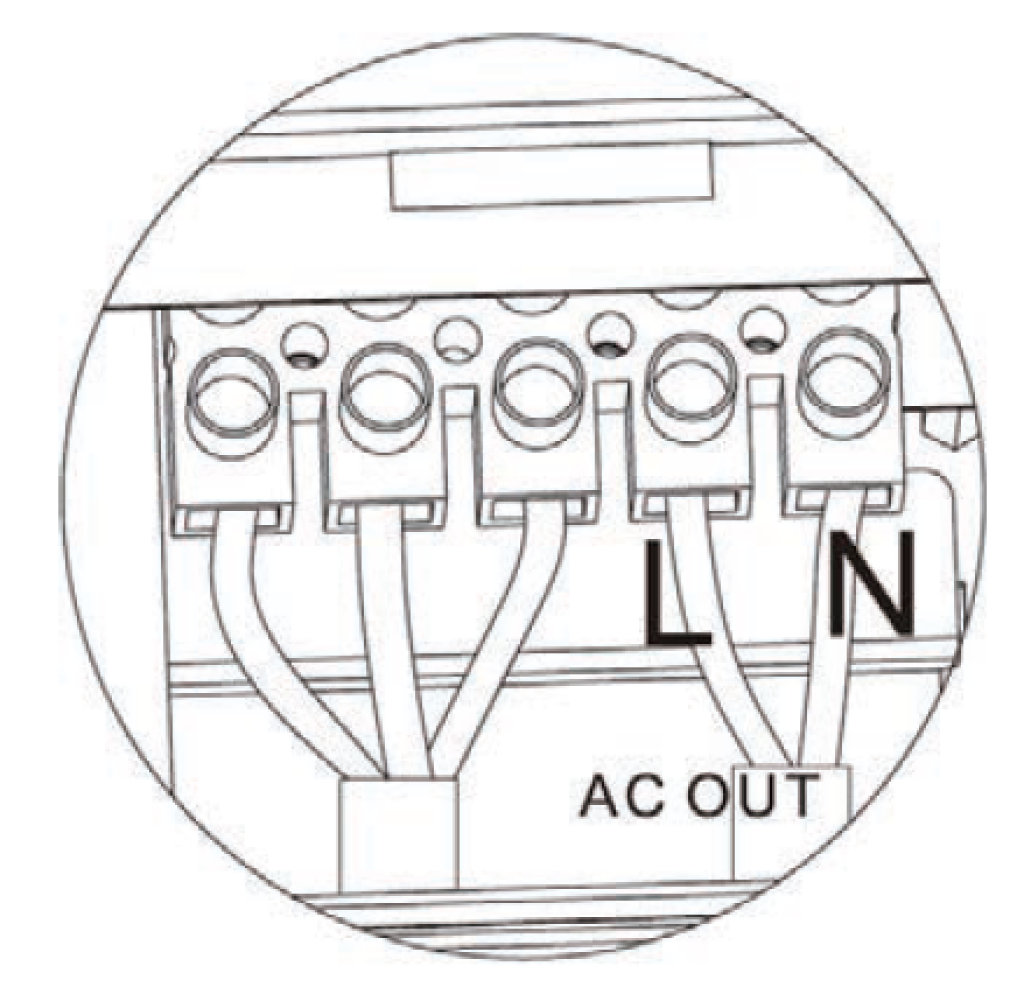
Step 5. Wiring The AC Output
Connect the AC output wire to the corresponding AC output terminal on the inverter. Then, connect the ground output cable to the ground terminal separately from the AC output terminals.
Be sure to keep the ground wire as short as possible — ideally close to the inverter.
Source: Renogy
Note to our readers: RV inverter terminal blocks have AC IN and AC OUT markings. It’s crucial not to mix up these connections.
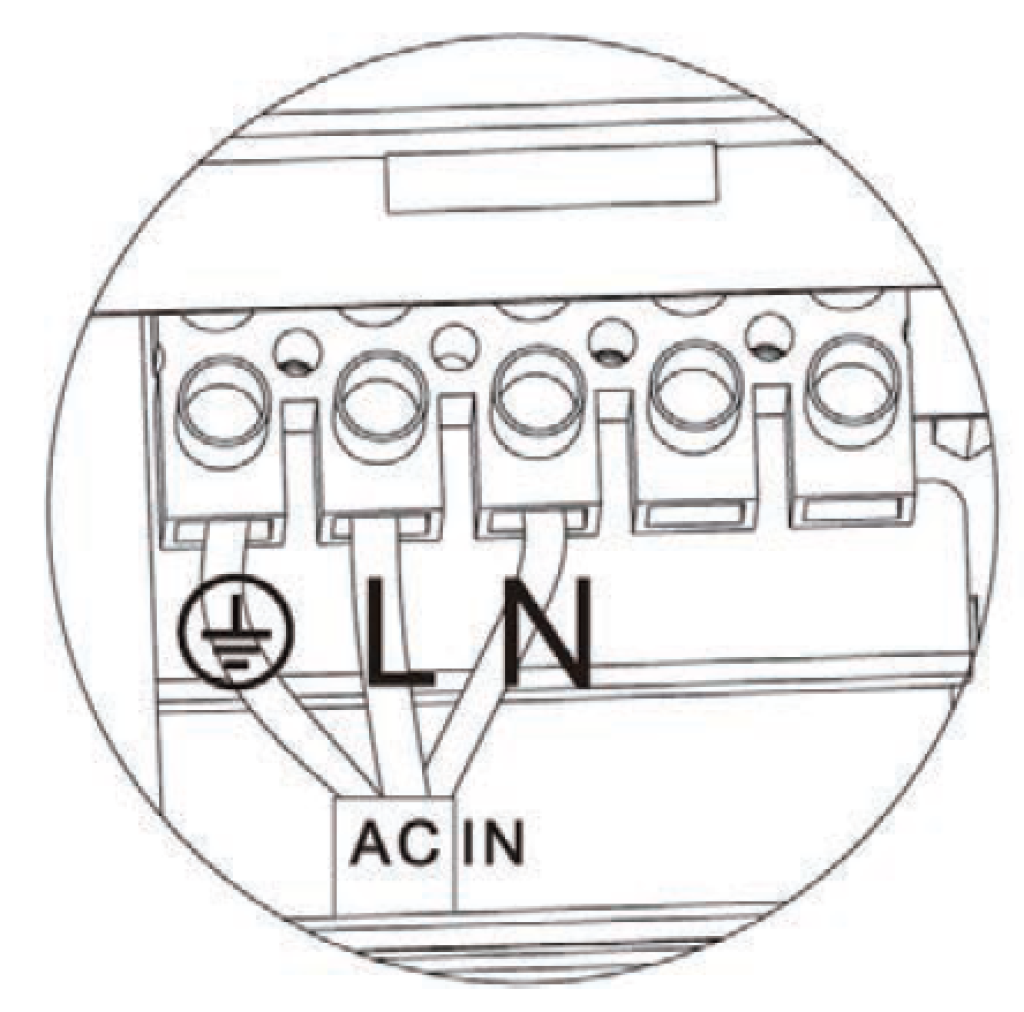
Step 6: Wiring The AC Input
Route the AC input line through your inverter’s designated AC input slot. Then, securely attach the wire to the terminals inside the inverter using the appropriate connectors.
Remember to use the correct cable size for your AC wiring.
Source: Renogy
Related reading: What Are The Best Lithium RV Batteries?
Things To Watch Out For When Installing An RV Inverter
Here are some things you’ll need to be mindful of when installing your RV inverter:
- Use protection. Wear protective eyewear while working with lead-acid liquid batteries. Battery acid can be harmful if it comes into contact with your skin. If this occurs, wash the affected area immediately with plenty of water.
- Be wary of metal. Avoid placing metal near your battery to prevent short circuits. Metal objects create safety hazards, so keep these away from the battery terminals.
- Purchase the correct tools. Gather all the necessary tools, materials, and mounting hardware for your specific inverter model.
- Ventilation is key. Acid gas build-up can develop during battery charging, so ensure your environment has adequate ventilation.
- Secure your wiring. Connect all wires securely to reduce the risk of shaking or loosening during travel. Improper connection can create heat which can melt surrounding materials.
- Protection from the elements. Protect your inverter from rain and snow if you have an outdoor setup.
- Be cautious with wires. Avoid touching high-voltage AC input and output wiring when installing your RV inverters.
- AC power supply. Ensure your RV inverter’s safety and proper functioning, only use one input AC power supply at a time. Additionally, only connect one power supply in parallel.
- Choose your location wisely. Don’t install your RV inverter in a harsh or dangerous environment. This includes areas that are damp, greasy, flammable, or explosive, as well as locations with high levels of dust accumulation.
Related reading: Using A Solar Generator In Your RV (A Complete Guide)
How To Make Your RV Inverter Installation Easier
RV inverters are a great way to harness AC power while on the road, but they can be tricky to install. Here are a few tips to make your RV inverter installation easier:
- Follow instructions. Carefully follow the manufacturer’s instructions that come with your inverter. This will ensure that you install it safely and correctly.
- Compatibility is key. Make sure you purchase an inverter compatible with your RV’s electrical system.
- Round up everything. Gather all of the necessary tools and materials before beginning the installation. This will make the process less taxing and help to prevent any delays.
- Plan around your battery. Check the location of your RV’s batteries and determine how to access them for installation.
- Size your installation area. Measure the area where you’ll install the inverter, as this will ensure you have enough space for it.
- Plan your wire routes. Do this from the batteries to the inverter and the solar panels to the inverter.
- Phone a friend. If possible, enlist the help of a friend or family member. Having an extra set of hands can make the installation process much smoother.
Related reading: RV Solar Panels (Everything you need to know)
Final Thoughts
Installing an RV inverter can seem overwhelming, but with careful planning and attention to safety, it can be a successful and rewarding project.
When you have all the necessary tools and information, it’s time to install your RV inverter. An RV inverter can significantly improve your off-grid experience, but it’s essential to take necessary safety precautions.
Make sure you consult a professional electrician and follow all national and local electrical codes to ensure a successful installation. And as always, follow the manufacturer’s instructions for installing and using your specific inverter model.
Ultimately, with a properly installed inverter, you’ll be able to enjoy all the comforts of home on your next camping trip!