
Building a DIY solar battery box is your best cost-saving option if you’re looking for a portable power station that matches your solar panels.
You may already be familiar with brands like Bluetti, Jackery, or EcoFlow and their bestselling product — the solar generator.
These components are designed to store solar energy on demand, but their high price can be off-putting.
Fortunately, you can circumvent this costly investment by building your very own DIY plug-and-play solar battery box at a fraction of the price! The building process takes only 2 hours over 7 steps.
Our DIY guide also includes a cost estimate for two DIY solar battery boxes of 640 Wh and 1200 Wh for a short camping trip or a more extended off-the-grid vacation.
Table of Contents
What Is A DIY Solar Battery Box?
A DIY solar battery box is a rechargeable portable power station that supplies AC electricity (110V, 60Hz) and USB charging.
This all-in-one solution combines three main components:
- Solar charge controller
- Inverter
- Lithium battery pack
Here is a simplified electrical diagram for a solar battery box:
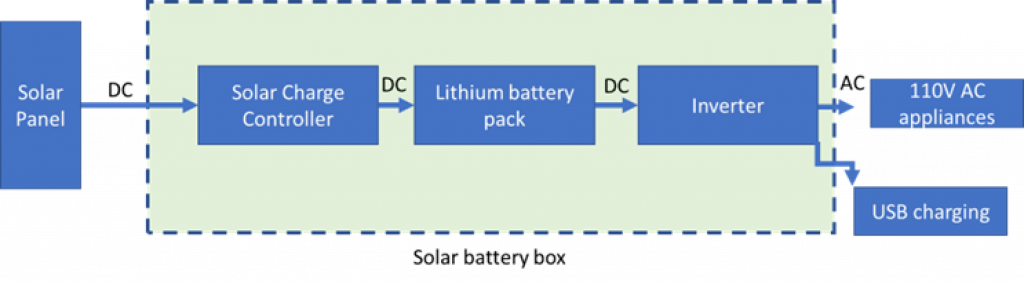
Solar Charger
The solar charge controller ensures safe and efficient charging of the battery with a solar panel. It ensures that the battery receives the correct voltage (12V, 24V, or 48V) and follows the proper charging profile.
We recommend the MPPT models; they are the most efficient.
Inverter
The inverter supplies power to the loads. It converts DC electricity from the battery into AC electricity usable by our appliances.
We recommend a Pure sine wave inverter. It provides clean and reliable electricity, similar to utility standards (110V, 60Hz).
Lithium Battery Pack
A lithium battery pack stores and supplies electrical energy. It consists of several modules connected in parallel and/or series to reach the desired voltage and capacity.
Lithium batteries are reliable and durable; they offer several advantages:
- Modular design
- Long life duration (4000 cycles, 10 years)
- Fast charging/discharging
- High energy density
Our build uses prismatic LiFePO4 (LFP) modules, each with a rated voltage of 3.2V. These 4 modules will link up in series to create a 12.8V lithium battery.
Material Needed For A DIY Solar Battery Box
Here are the components you’ll need for your DIY build:
| Image | Description | Link |
|---|---|---|
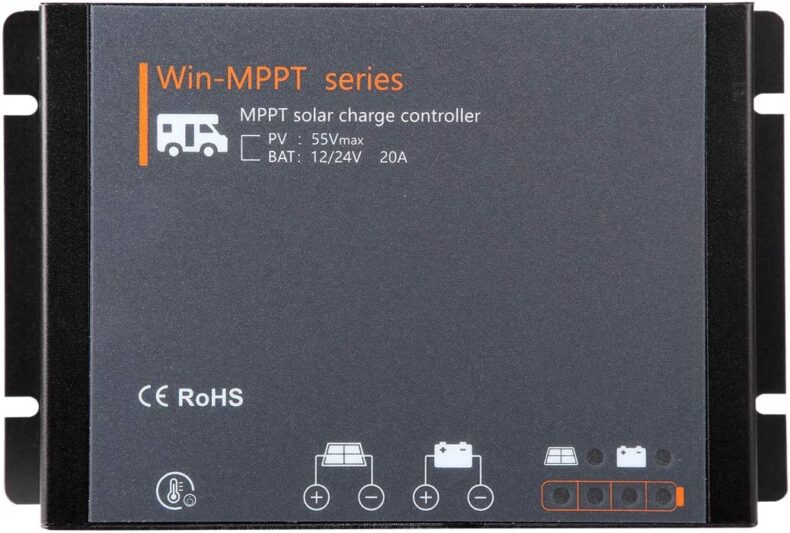 | MPPT Solar charge controller – 20A | View on Amazon |
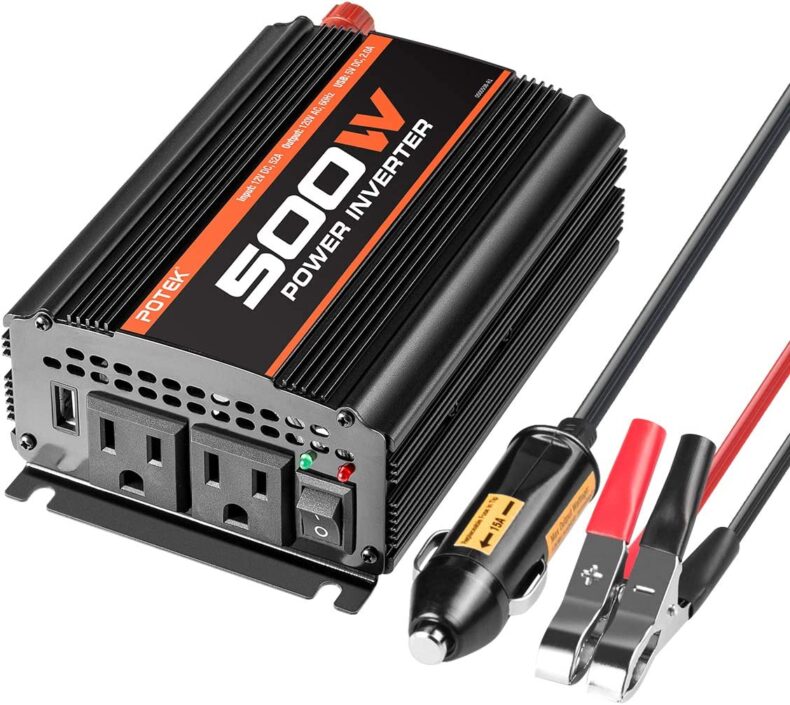 | 12V Inverter-500W | View on Amazon |
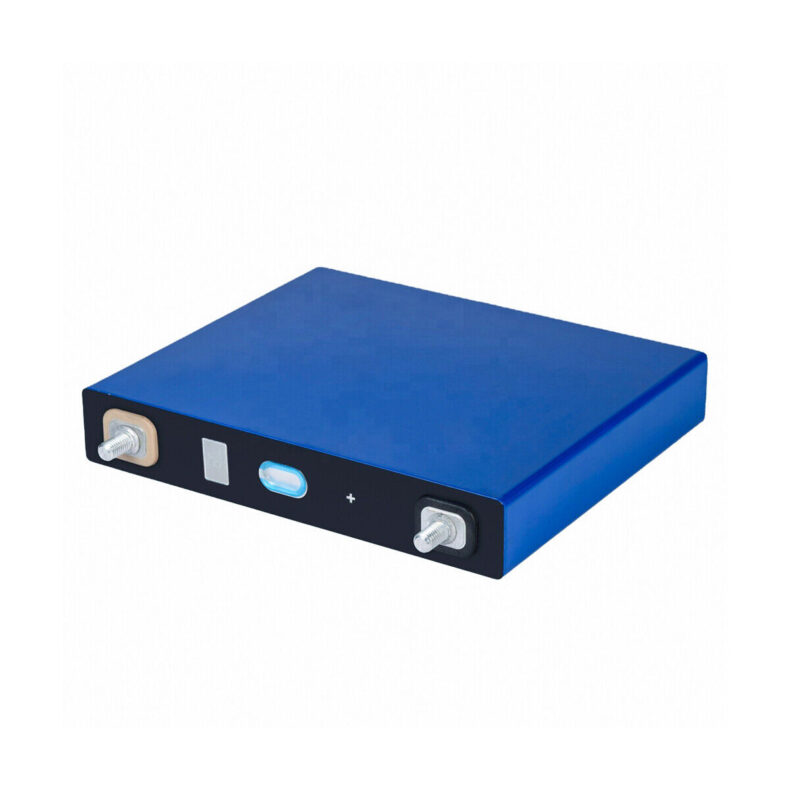 | Lithium battery prismatic cells – 4Pcs, 3.2V, 50Ah | View on eBay |
 | BMS (battery management system) | View on Amazon |
 | Battery balancer 4S | View on Amazon |
 | Waterproof battery capacity monitor | View on Amazon |
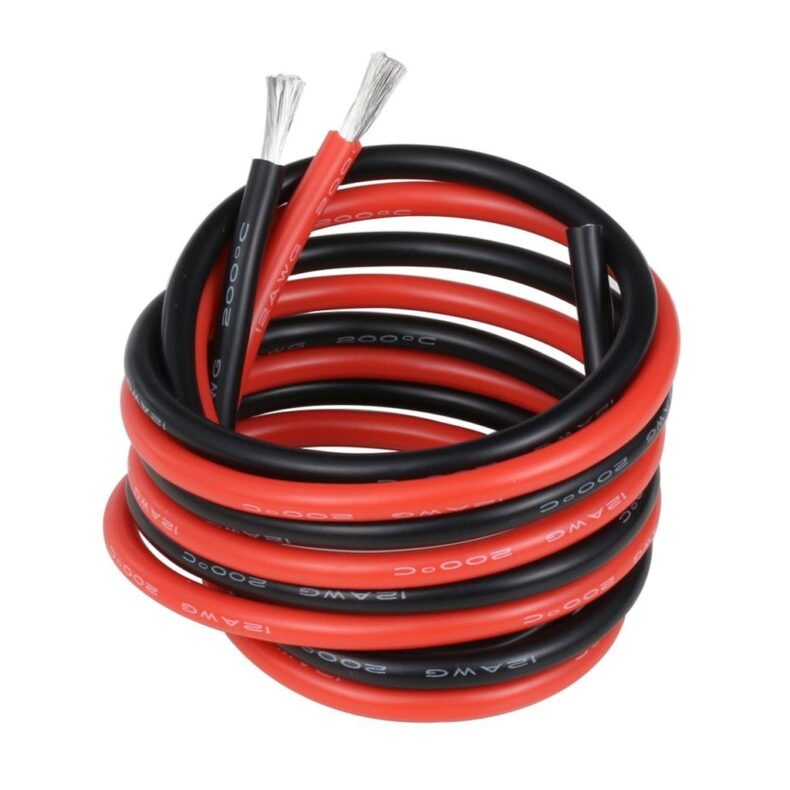 | Electrical wiring 12AWG and 4AWG cables | View on Amazon |
 | Ring and fork terminals | View on Amazon |
 | Electrical tape | View on Amazon |
 | DC Breaker with fuse 100Amps and 40Amps | View on Amazon |
 | Master Switch -DC | View on Amazon |
 | Waterproof AC outlets 110V | View on Amazon |
 | USB cord male to male | View on Amazon |
 | Battery box casing | View on Amazon |
Tools Needed For A DIY Solar Battery Box
Here are the tools you’ll need to build your solar battery box:
| Image | Link | |
|---|---|---|
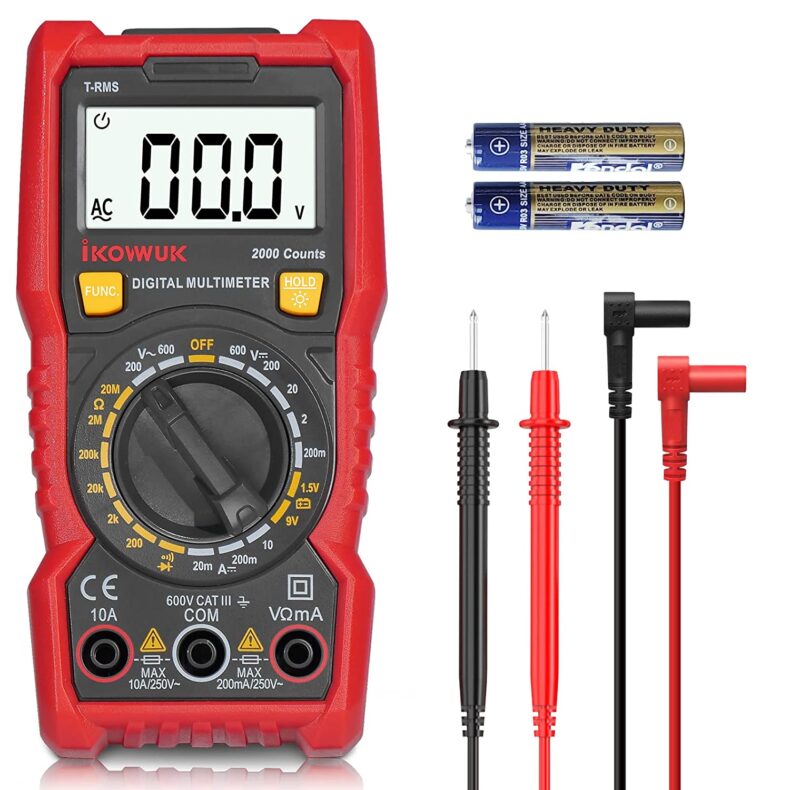 | Digital multimeter | View on Amazon |
 | Wire stripping tool | View on Amazon |
 | Combination plier | View on Amazon |
 | Ratchet set | View on Amazon |
 | Drill with a hole saw | View on Amazon |
 | Screwdriver set | View on Amazon |
 | All-purpose silicone sealant | View on Amazon |
How To Build A DIY Solar Battery Box
The specifications of our DIY solar battery box are as follows:
| Capacity | 640 Wh |
| Power output | 500W continuous (1000W surge) |
| Max solar charging power | 260W |
| Time to full charge with a 200W solar panel | 4-5 hours |
| Weight | Less than 22lbs |
| Dimension | 10.62 x 9.68 x 6.87 inches |
| Output | 2*AC 110V & 2 USB |
| Input | Solar panel charging (max 260W) |
Now that you’ve gathered your materials and tools, it’s time to set up your workspace and get cracking!
Here is the 6-step process for your DIY solar battery box:
1. Assemble The Lithium Battery Pack
This step involves building a 12V, 50Ah(650Wh) lithium battery bank ready to fit in your DIY solar battery box.
For this step, you’ll need the following:
- 4 Lithium battery modules (3.2V, 50Ah)
- BMS
- Battery balancer
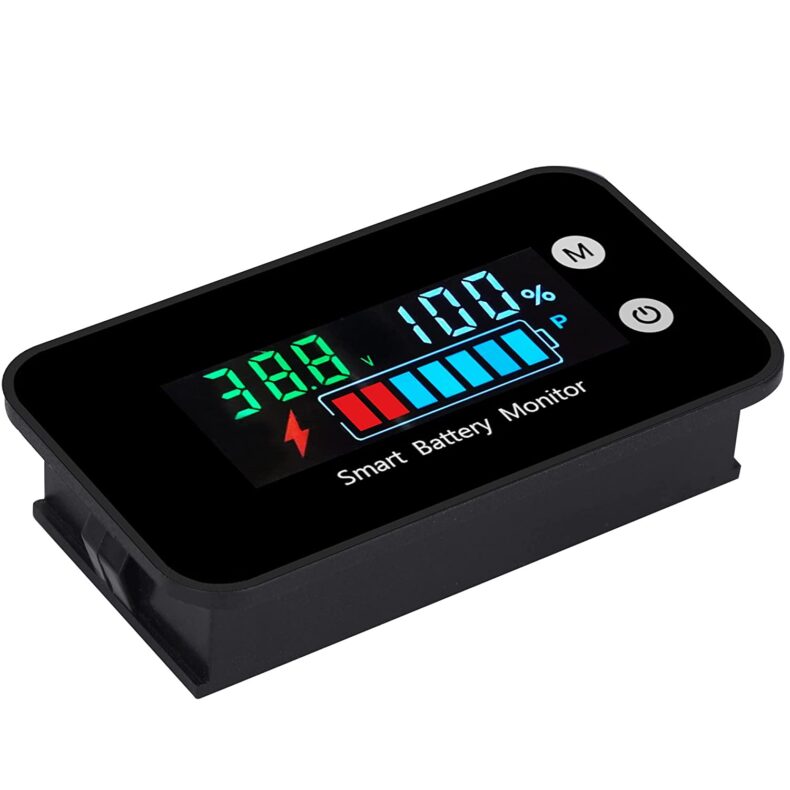
- Battery capacity monitor
- Electrical wires
- Electrical tape
- Ring and fork terminal
First, let’s have a look at the final result of a lithium battery pack with 4 modules:
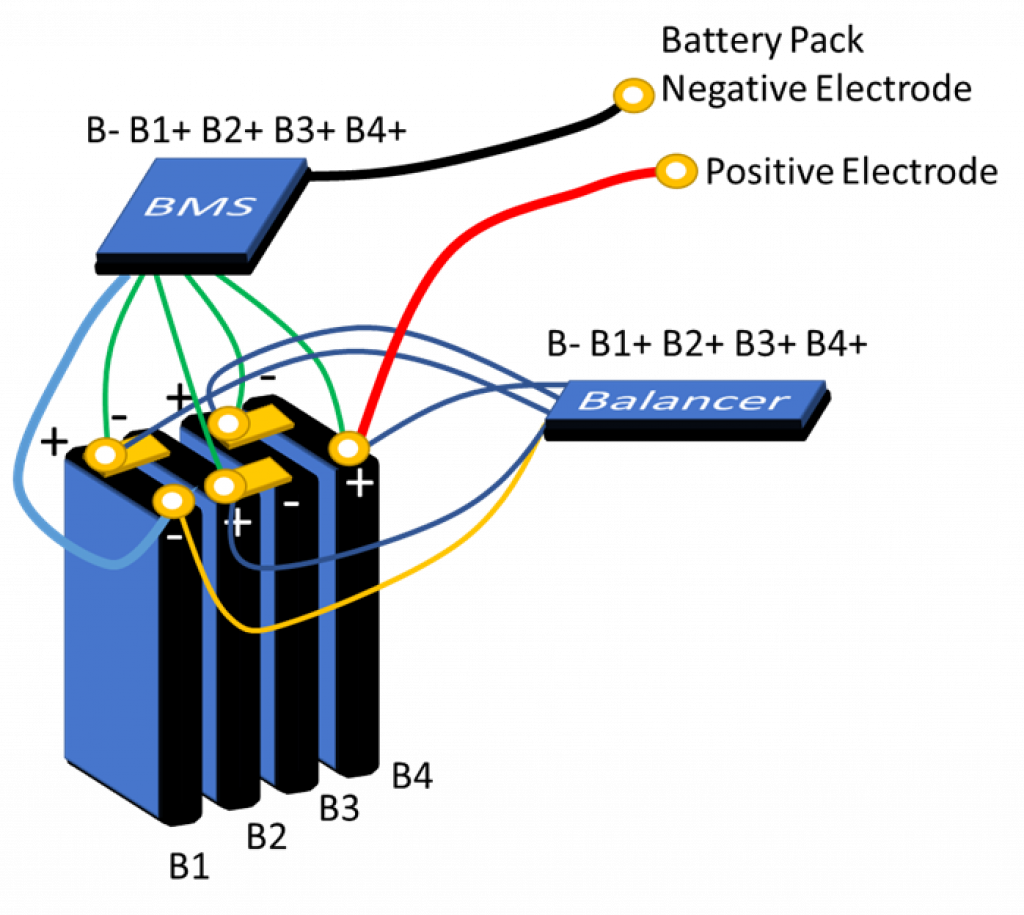
Combine The 4 Battery Modules
First, assemble the 4 modules (B1, B2, B3, B4). Make them stand and organize them as pictured. The positive electrode of one module should be close to the negative electrode of the next one.
The battery modules come with bus bars and nuts; position the bus bars to connect the four modules in a serry. At this point, get some duct tape and wrap the 4 modules together as tight as possible. The rated voltage of each module is 3.2V; in total, you’ll get 12.8V.
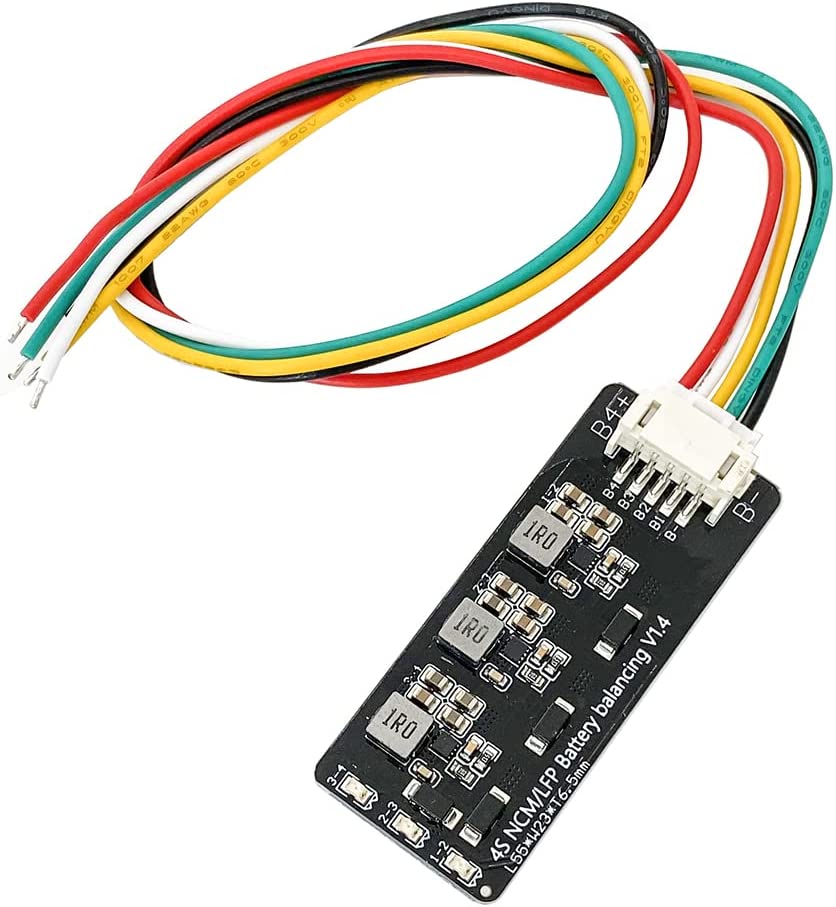
Wire The Battery Balancer
Now, add the battery balancer — it helps maintain each battery module at the same state of charge.
To do this, grab the micro connector string of wires and add a ring terminal to each wire. Do not connect the wire string to the battery balancer yet. Instead, position each wire electrode at the corresponding battery module terminal.
You’llYou’ll start with B-, which is connected to the first negative electrode of B1. Then go on with the 4 other wires connecting to each battery module’s positive electrode, from B1+ to B4+. You’llYou’ll carry out the same process for the wiring of the BMS.
Wire The BMS
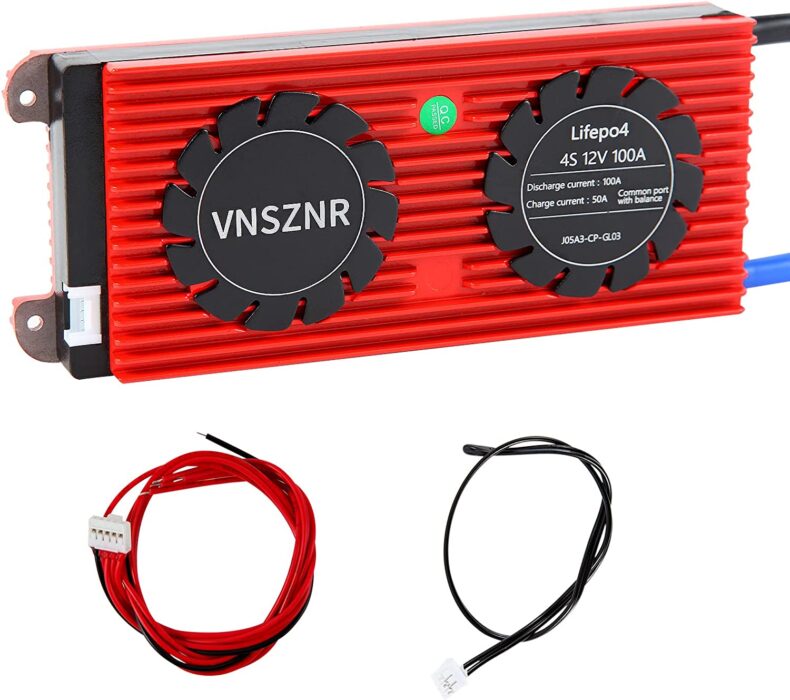
A BMS is an essential component of a lithium battery bank — it monitors and protects the battery.
Grab the micro connector string of the BMS and add a terminal ring to each wire. For the larger B- cable, you’ll need an AWG4 ring.
Position each wire at the corresponding battery module electrode. B- goes at the negative electrode of the first module, then B1+ to B4+ to the positive electrode of each module (B1 to B4).
Voltage Testing
Now, tighten the screws of each bus bar on top of the battery modules.
Now that all the modules are connected, it’s time to test your wirings.
First, check the overall voltage of the pack by measuring between B1- and B4+ — you should read around 12.8V. Then check the voltage of the battery balancer.
Grab the micro connector string, and measure the voltage between each wire with the needle electrode of your multimeter. Keep the multimeter negative electrode on B1- and move the positive electrode from B1+ to B4+. You should read 3.2V for B1+, 6.4V for B2+, 9.6V for B3+, and 12.8V for B4+.
Repeat the same operation for the wires of the BMS. You can now connect your battery balancer and BMS if everything is fine.
That’s it; you have a complete lithium battery pack!
2. Prepare The Case
Now it’s time to prepare your box to hold its constituents. All the outlets, the main switch, and the battery monitoring screen are accessible from the top of the box.
Use your drill with the hole saw accessory to install the AC outlets. Insert the plug and apply silicone sealant at the edge.
Repeat the same operation for the solar panel wires and the main switch using waterproof electrical connectors.
For the battery monitoring system, you’ll need to cut a rectangular shape, don’t forget to seal it with silicone.
3. Install The Battery Pack

The largest component of this DIY solar battery box is the battery pack — you need to install it first.
Feel free to organize your space in the box. However, we suggest strapping the battery pack in one of the corners.
4. Install The Inverter
Firmly maintain the inverter with straps inside the case. Make sure it’s placed near the negative and positive electrodes of the battery.
5. Install The Solar Charge Controller
The solar charge controller is relatively small, so you should install it last. Put it as far as possible from the inverter for better thermal management.
6. Wire The System
Finally, it’s time to wire all the components, starting with the inverter.
Connect the two AC outlets to the inverter.
- Use the 4AWG cable to connect the inverter and the battery.
- Get the 12AWG wire and link the solar charge controller to the battery and the solar panel extension cable.
For safety, don’t forget to add 3 fuses between:
- The solar panel and solar controller
- The solar controller and battery
- The battery and inverter
Your solar battery box is now complete! Now, charge your system by connecting a 200W solar panel.
DIY Solar Battery Box Cost
A DIY solar battery box with a capacity of 640Wh and a power output of 500W costs less than $570.
This will give you enough energy to power lights, a phone, a laptop, a TV, and an electric fan during a short camping trip.
For a larger capacity, be prepared to spend around $1100. This price point will provide you with a 1.2kWh and 1.5 kW output. With this battery, you can run a mini refrigerator/freezer!
Final Thoughts
Don’t be afraid of building your own DIY solar battery box — components are cheaper than ever, and you can access them easily online.
As a bonus, you’ll save a lot of money! The build is 25 to 30% cheaper than commercial power stations.
Additionally, thanks to modular lithium battery technology, you’ll have the chance to customize your solar battery box from a light model for a short trip to a larger battery box to power an off-grid cabin.
Finally, contrary to commercial models, you’ll be able to replace a component in case of failure.