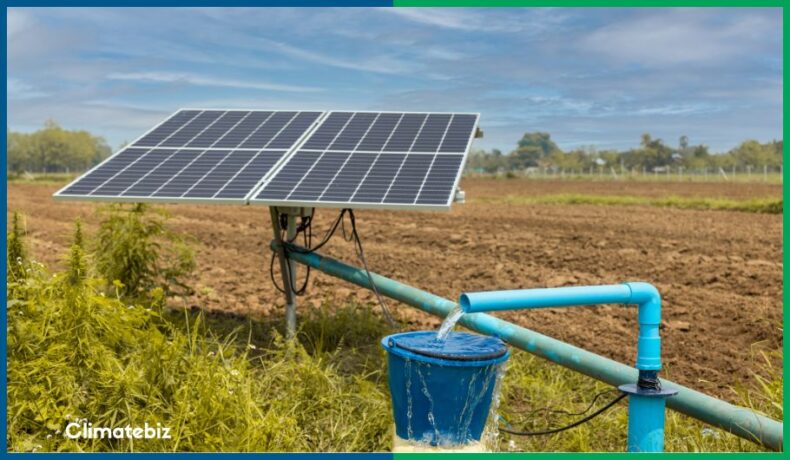
Building a DIY solar water pump is an effective and cost-saving way to fulfill all your water needs.
Pumping water is essential for many domestic and commercial activities. Doing so allows you to supply water to an off-grid house, irrigate crops, or filter water in a swimming pool or a pond.
Fortunately, you can do all of the above at a low cost with a DIY solar water pump.
In this article, we provide you with the critical information to design, select and install your very own DIY solar water pump using 4 straightforward examples!
Table of Contents
What Is A DIY Solar Water Pump?
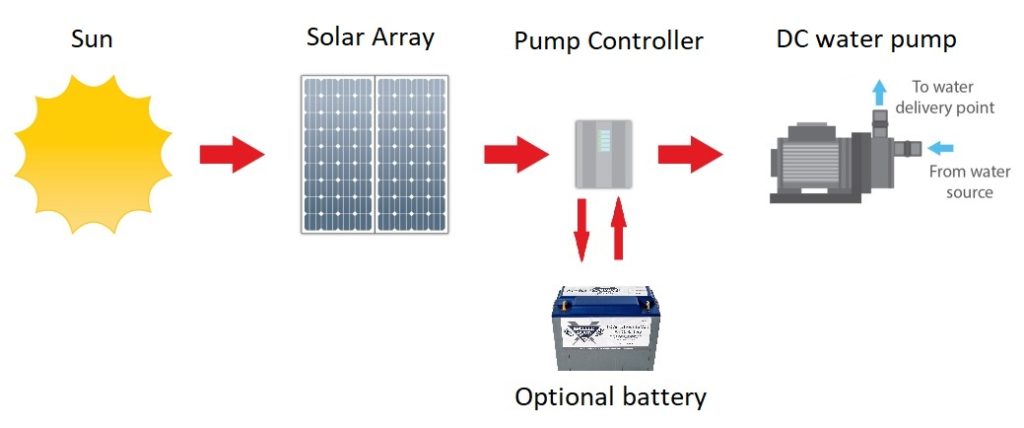
A DIY solar water pump involves a simple build that combines solar panels, a controller, and a DC water pump in a stand-alone system.
In short, the solar array generates DC electricity to power the water pump.
With this system, you can also add a backup battery for continuous use throughout the night or on a cloudy day.
Please note: for this build, we only consider DC water pumps. They are twice as efficient as the AC models.
Material Needed For A DIY Solar Water Pump
To build a DIY solar water pump, you’ll need the following components:
- DC Water pump
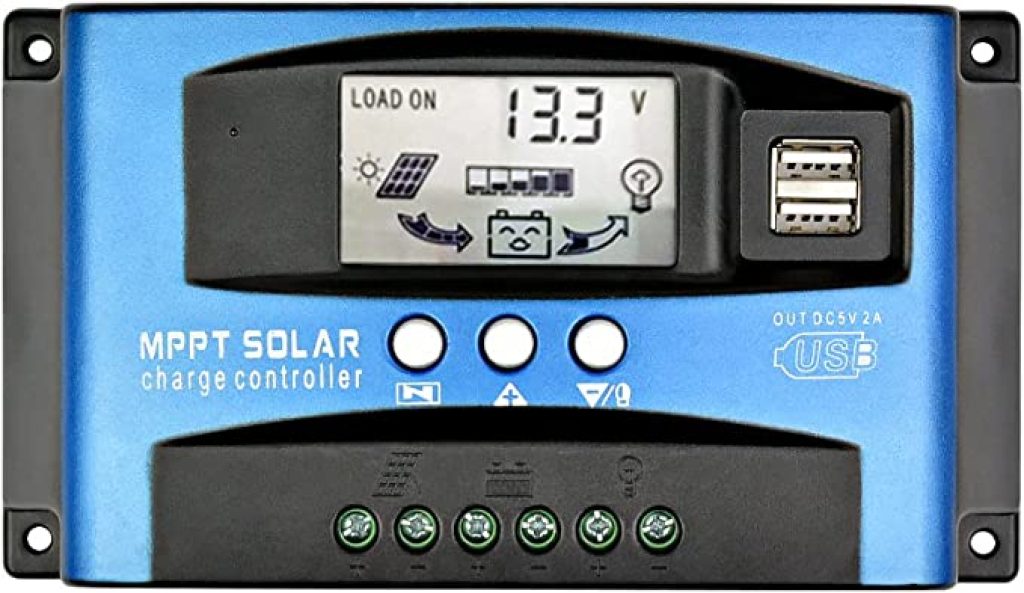
- Solar pump controller or solar charge controller (MPPT type)
- Solar panel
- Optional battery
The below table summarizes the parts you’ll require for 4 different DIY solar pump projects:
| Purpose | Water Pump Image | DC Water Pump Power | Pump Controller | Product Link | Solar panel | Optional Battery |
|---|---|---|---|---|---|---|
| Supply house / deep well | 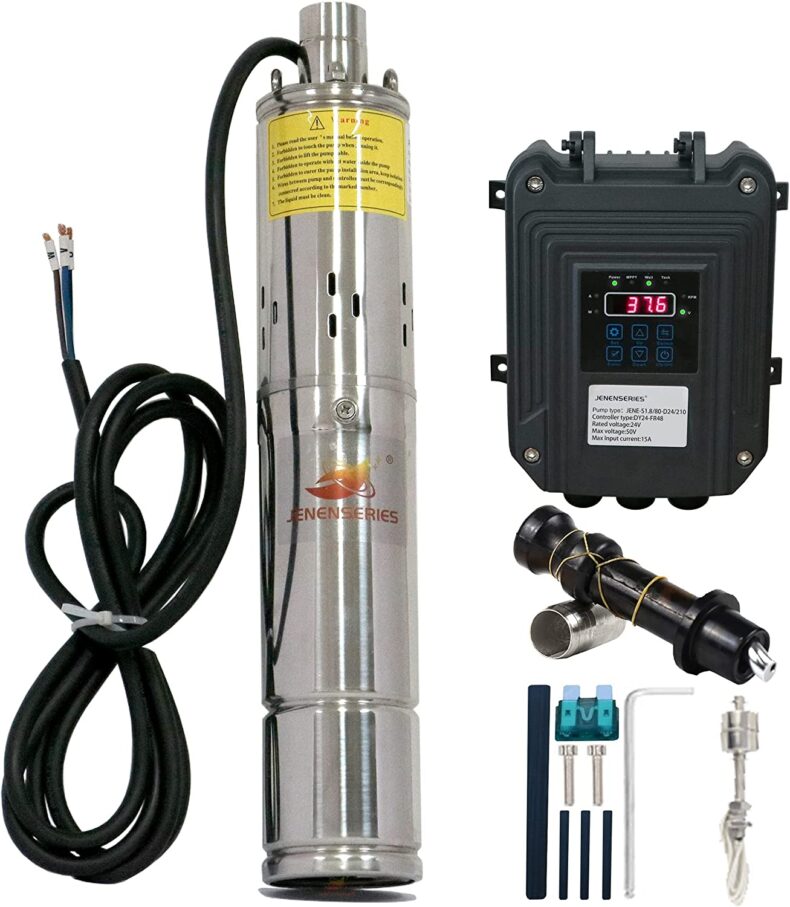 | Submersible, 270W | Included | View Product | 500W | – |
| Swimming pool /Pond circulation | 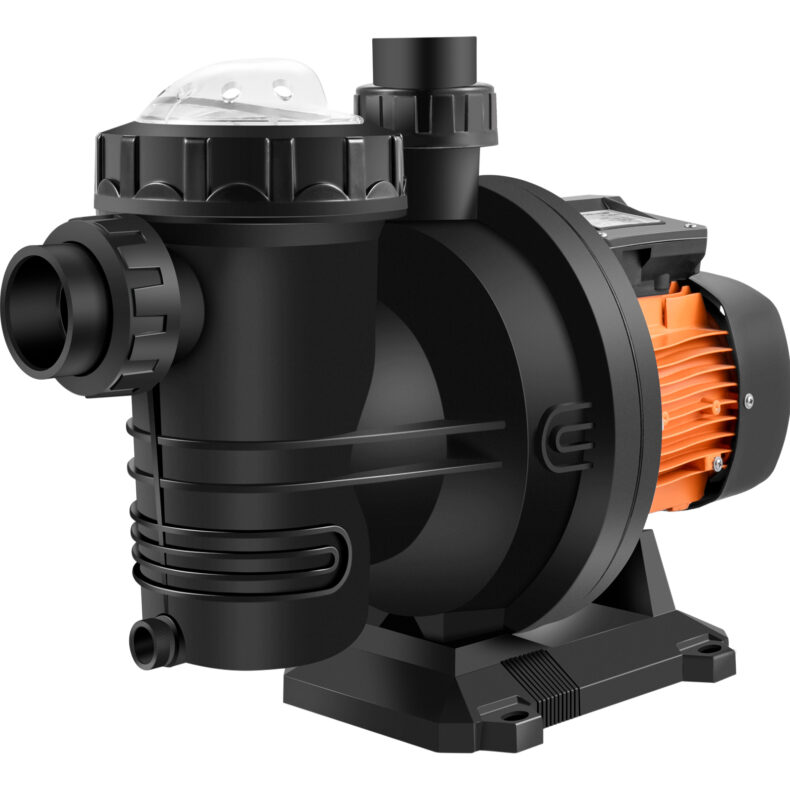 | Surface, 500W | Included | View Product | 2*350W | – |
| Agricultural irrigation | 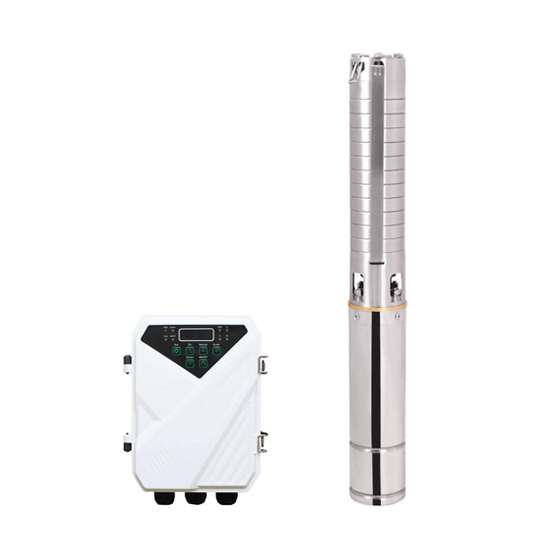 | Submersible, 1500W | Included | View Product | 5*400W | – |
| RV/boat circulation pump | 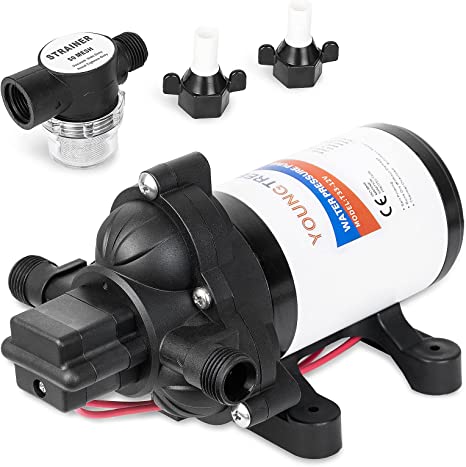 | In-line, 70W | 12V, 10A | View Product | 100W | 12V, 10Ah |
Now let’s discuss how you can select the best parts for your DIY solar water pump.
Selecting The Correct DC Water Pump
The best pump for a DIY solar water project is a DC water pump. These DC pumps have two main advantages over AC(Alternating Current) water pumps:
- They are twice as efficient, pumping two times more water!
- They don’t need an inverter.
As they are named, DC water pumps only use DC electricity, which is excellent because our solar panels also produce DC electricity.
You won’t need an extra conversion step; overall, your pumping system will be more efficient.
That said, the best DC water pump for your project is the one that is adapted to your needs and your site.
In the chart below, we selected 4 DC water pumps covering different use:
| Purpose | Water Needs | Pump Type | Pump Power (DC) | Pump Voltage | Max. head | Product Link |
|---|---|---|---|---|---|---|
| Supply house / deep well | 400 gal/day (1.6m3) | Submersible | 270W | 24V | 400ft / 120m | View Product |
| Swimming pool /Pond circulation | 4500 gal/hour (18m3/hour) | Above ground | 500W | 48V | 49ft / 15m | View Product |
| Agricultural irrigation | 5000 gal/hour (20m3/hour) | Submersible | 1500W | 110V | 665ft / 200m | View Product |
| RV/boat circulation pump | 100 gal/day | In-line | 70W | 12V | 9.8ft / 3m | View Product |
Selecting The Correct Pump Controller
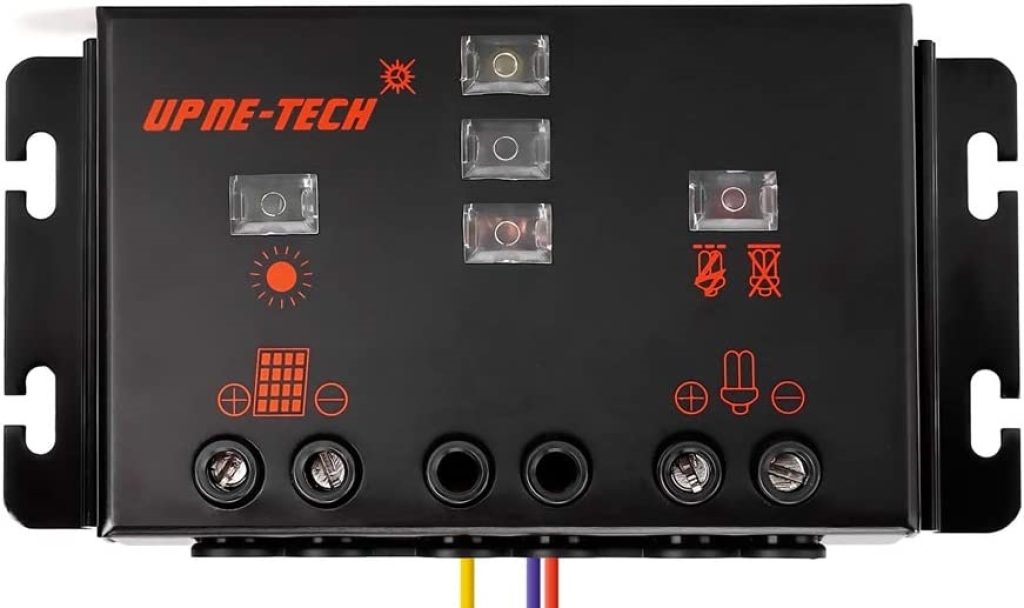
The primary function of a pump controller is to optimize the supply of electricity from the solar panel to the water pump. It ensures that the pump receives the correct DC voltage (12V, 24V, 48V, 110V) and the highest current for maximum efficiency. Additionally, it controls and protects the water pump.
The best pump controllers integrate a water sensor for automatic start & stop and a WiFi connection for monitoring purposes. Moreover, they can connect to a battery that supplies power to the pump if there isn’t ample sunlight. In this scenario, the battery charges while the water pump runs.
Controller Type
Always select an MPPT pump controller; it is the most efficient at harvesting solar energy.
Know Your Voltage And Power
To choose the correct solar pump controller, you’ll need to know your water pump’s voltage and maximum power. For example, a 70W water pump works at 12V, with a maximum current of 5.8A. A 12V solar controller with a maximum load of 10A will be a good match.
Luckily, most DC water pumps come as a bundle with their own controller, so you probably won’t need to look for one.
Selecting The Correct Number Of Solar Panels
A solar panel array converts sunlight into DC electricity which powers the pump.
The number of solar panels you require depends on two factors:
- Your water needs
- The solar irradiation at your location
Naturally, the more powerful your solar panels, the longer your pump will run and the more water you’ll get.
Now, finding the right balance between the number of solar panels and your water supply can be tricky. First, you should start with your water needs.
Example
Let’s say you’re running a circulation pump for a swimming pool. It must filter at least all the pool water in one day.
Assuming that the day is 12 hours and the pool capacity is 26,500gal (100m3), that means an average of 2,200gal per hour (8.3 m3 per hour).
The maximum flow of a 500W water pump is 4,500gal per hour (18m3 per hour). Therefore, it’ll only take 6 hours for this water pump to circulate all the swimming pool water.
In terms of electricity, it will use a total of 3 kWh (6h x 500W).
Now, you can determine the number of solar panels required to produce a daily average of 3 kWh. For this, you’ll need to know your location’s PVOUT (specific PV power output).
In California, the PVOUT is 4.9kWh/kWp. This means that every kW of installed solar panels produces 4.9kWh daily.
For 3 kWh, you’d need 612W. Let’s add a 15% safety margin, and we’ll get a total of 700W or 2 x350W solar panels for this DIY solar water pump system.
Selecting The Correct Battery
Having a backup battery as part of your DIY solar water pump depends on your usage patterns.
You probably won’t need a battery for a circulation pump (pool and pond) and irrigation.
However, the same cannot be said for situations involving an RV or a boat. In these instances, you’ll need a solar battery to use your pump at any time of the day.
Our Recommendation
We recommend lithium batteries; they are more efficient and durable than lead-acid batteries (gel, AGM).
In an RV, a 70W water pump runs for around 1 hour daily. This means you’ll need a battery of 100W.h to use your pump at any time conveniently.
In this scenario, a 12V, 10Ah lithium battery is perfect.
How To Make A DIY Solar Water Pump
Building a DIY solar water pump is not a complex task. However, we advise you to focus on the preliminary sizing steps; they are the most important.
We’ve divided this build into the following 8 steps:
- Know Your Water Needs
You’ll need to know your water needs to select and design the correct solar water pumping system. Do this by asking yourself the following questions:
- What quantity of water do I need every day?
- When do I need water?
- What water flow/pressure do I need?
2. Know Your Site
During a first site visit, you’ll determine the water source and its characteristics, such as the quality of the water and its availability over the long term.
This is also the right time to select the location of your solar array and water pump.
You’ll need to measure the length of the cables between the solar array, pump controller, and water pump. We advise that you place the solar panels as close as possible to the water pump to limit the power loss through the wires.
Make sure your selected site for solar panels is free from shadow and facing South (in the Northern hemisphere).
Then determine where and how you’ll store your water. With this information, you’ll be able to measure the static head for the site (height between the water level at the source and the storage tank).
After that, measure the total distance from the water source to its final location, including any land irregularities (hills, ditches, etc.) the piping system must traverse.
Save all these figures for step 5.
3. Select Your Piping System And Calculate The Dynamic Head
Select the size and type of water pipe required to transfer the water from the source to its storage tank or final destination.
Water pipes create friction that water flow. To estimate the impact of friction loss, manufacturers commonly use the total dynamic pump head (TDH).
The dynamic head combines:
- The static head, the distance between the water level at the source and the top of the water tank
- The friction loss is related to the length, the diameter, and the configuration of your piping system (elbow, curve).
Estimate your friction loss here.
4. Determine Your Solar Energy Potential Production
You’ll need a solar calculator to calculate your solar energy production.
One of the most accurate solar prediction models is developed by Solargis on Solar Global Atlas.
- Enter your site location and look for the photovoltaic power output (PVOUT) in kWh/kWp. It expresses the potential daily production (in kWh) of one kW of solar panels.
5. Choose Your Pump And Solar Panels
Choose a type of pump consistent with the quality of the water being pumped and the overall characteristics of the site (total dynamic head, water flow, and daily volumes).
Select the correct number of solar panels according to your water pump’s power and water needs, as described in part 2.
6. Install Your Solar Panel Array
For domestic or agricultural use, we recommend a ground-mounted solar system.
It is easier to set up and maintain than a rooftop solar array. In addition, you can use the space below the ground structure to install your pumping system.
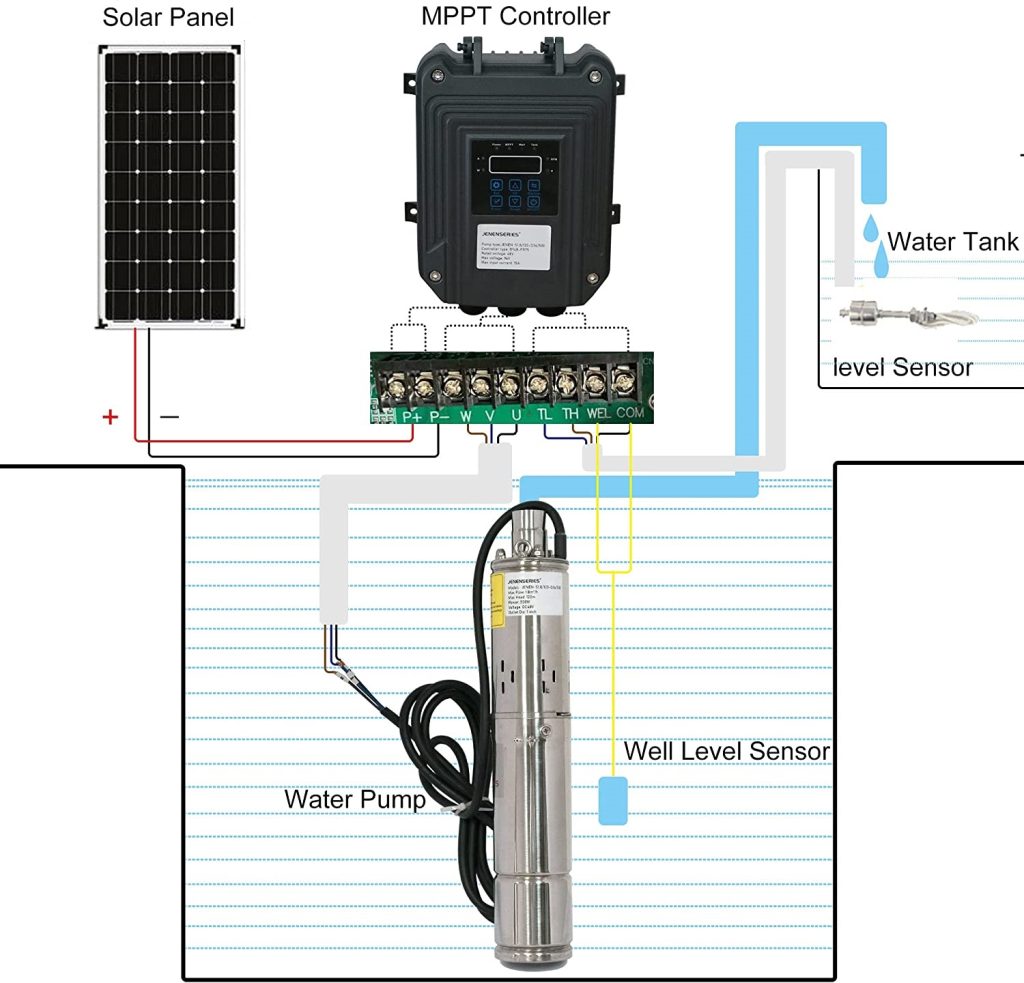
7. Wire Your System
You’ll need to prepare a panel board to fix the solar pump controller. At the bottom of the controller, you’ll find the solar input, the pump cable entrance, and the water level sensor cable entrance.
To connect all the parts, follow this simplified wiring diagram below:
8. Optional Step: Connect Your Battery
As an option, you can connect a battery for prolonged use. Be sure that your solar controller is designed for battery charging.
Please note: we recommend downloading this free solar water pump sizing software for more accurate sizing of your solar array and water pump power.
How Much Do DIY Solar Water Pumps Cost?
We found out that the total cost for a DIY solar water pump ranges between $239 for an RV solar pump and $2845 for agricultural irrigation.
We summarized our findings in the table below:
| Purpose | DC Water Pump | Pump Controller | Solar Panel Array | Optional Battery | Total Cost |
|---|---|---|---|---|---|
| Supply house / deep well | $549 | Included | $457 | _ | $1006 |
| Swimming pool /Pond circulation | $367 | Included | $752 | _ | $1119 |
| Agricultural irrigation | $982 | Included | $1863 | _ | $2845 |
| RV/boat circulation pump | $49 | $21 | $109 | $60 | $239 |
Final Thoughts
A DIY solar water pump is a simple build with low complexity. You’ll only need solar panels, a DC water pump, and a controller.
Sizing your system is the most critical part of this DIY project. You must know your water needs and the characteristics of your site:
- Geography
- Water resources
- Solar irradiation
Although the upfront cost is higher, with its low operation cost, a DIY solar water pump saves you money in the long term.
In addition, it is a stand-alone system that doesn’t need a connection to the grid. That makes it the perfect water pump for agricultural irrigation.