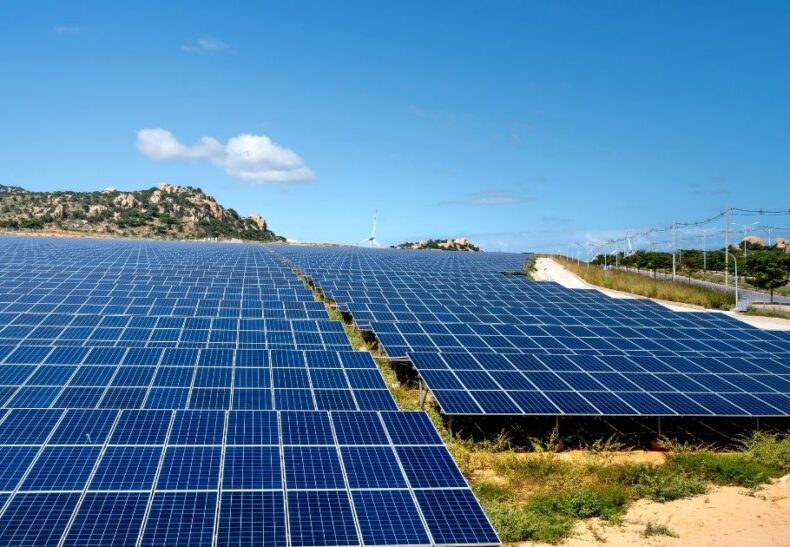
Ground-mounted solar panels are easier to install and maintain than rooftop systems, making solar energy accessible to homeowners at a lower cost.
That said, you still need to approach this process cautiously — there’s a fair amount to do. You need to determine the best ground frame design, figure out how to build it, and install and connect your solar panels.
A lot can go wrong during this process. As such, it’s worth looking for assistance.
In this article, we guide you step-by-step through installing your ground-mounted solar panels in a pure DIY fashion. We make it easy to understand and reproduce thanks to pictures and plans of a setup we created.
Additionally, we discuss the cost, production capacity, and advantages of ground-mounted solar panels.
Let’s begin with our installation guide.
Table of Contents
How to install ground-mounted solar panels
Note to our readers: The project discussed and shown throughout this article was designed and carried out by our resident Doctor of Chemistry and off-grid enthusiast, Romain Metaye.
Here are the five steps for a DIY installation of ground-mounted solar panels:
- Select the best spot for your ground-mounted solar panels.
- Design and build your ground structure.
- Mount your solar panels on the ground structure.
- Connect your solar panels to your inverter.
- Maintain your ground-mounted solar panels.
For our scenario, we consider the following:
- System size: A 2.4kW solar system of 6 x 400W solar panels.
- Recommended number of people for installation: 2 to 3 people
- Total installation time: 2 to 3 days, including the building of the ground structure and solar frame.
Step 1: Select the best spot for your ground-mounted solar panels
Key Takeaways:
— Choose the sunniest spot (full sun).
— No tree or building shading from 10 am to 3 pm.
— Facing south (in Northern Hemisphere). Facing north (in Northern Hemisphere).
— Clear the grounds according to the area covered by your solar panels. Give yourself an additional 20% of extra space.
This is the most important preliminary step — choosing the best spot in your garden to maximize your solar production. Solar panels love direct sunshine — they don’t mesh well with trees and shading. In fact, shaded solar panels can produce 10 times less energy than under full exposure.
Therefore, it’s vital that you pick the sunniest place in your garden — specifically from 10 am to 3 pm when solar production is at its peak.
Next, ensure that your spot has sufficient space for your ground structure. To do so:
- Calculate the total surface of your solar panel array.
- Add 20% extra space to allow movement around your structure.
For example, a 400W solar panel covers an area of approximately 2 sqm or 21.5sq.ft. Therefore, 6 solar panels cover a total of 12 sqm or 129sq.ft
As such, you’ll need a total area of around 15 sqm or 155sq.ft (including 20% extra space) to install a ground structure comprising 6 x 400W solar panels.
Step 2: Design and build your ground structure
Key takeaways:
— Concrete foundations.
— GI pipe or wood lumber structure.
— Insecticide wood treatment and outdoor paint/varnish.
Now that you’ve chosen the best spot on your property, you’re ready to design and build the structure to support your solar panels.
Materials for a ground-mounted solar panel structure
Remember that your solar panels will last for at least 25 years. Ideally, your structure should also last that long.
We recommend using galvanized iron (GI) pipes for your structure and frame. You can assemble these with some welding. If your budget is limited or if you don’t have a welding machine, you can use wood lumbers instead.
Medium-hard wood is a good option, but you must treat it to protect against termites and fungus. Additionally, you must varnish and/or paint it to preserve it further.
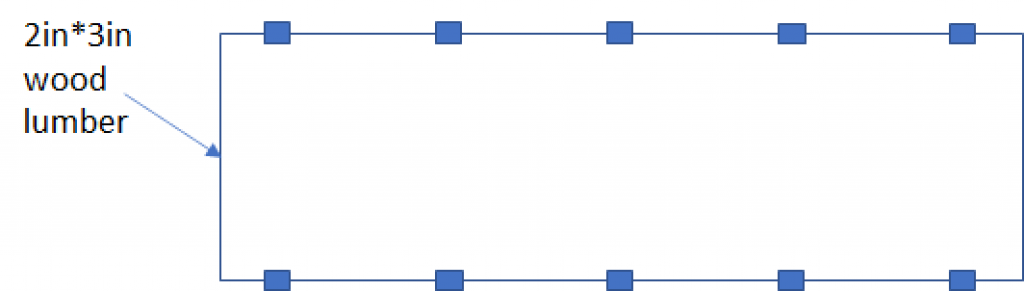
For our 6 x 400W solar panel installation, we used 25 pieces of 2in x 3in x 8ft coconut lumbers, four bags of cement, and an adequate amount of sand and gravel for the concrete mix.
Building the structure
We strongly advise that you build a structure tall enough for you to walk underneath. Six to seven feet high ideal.
The following simplified construction plan applies to the 6 x 400W solar panel installation plan.
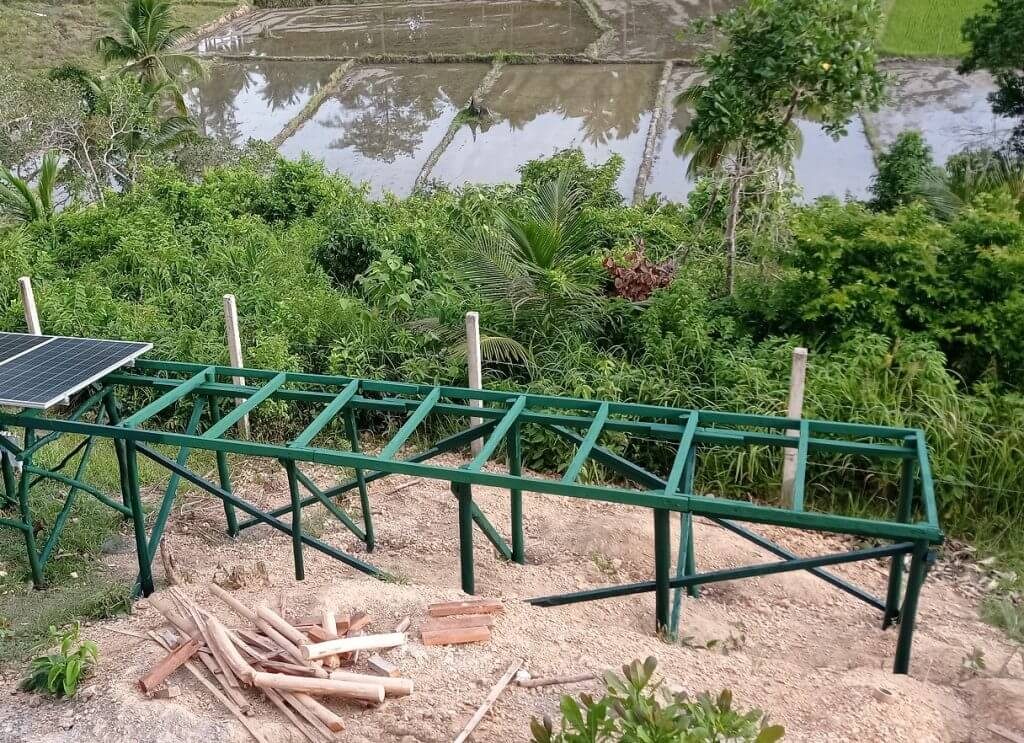
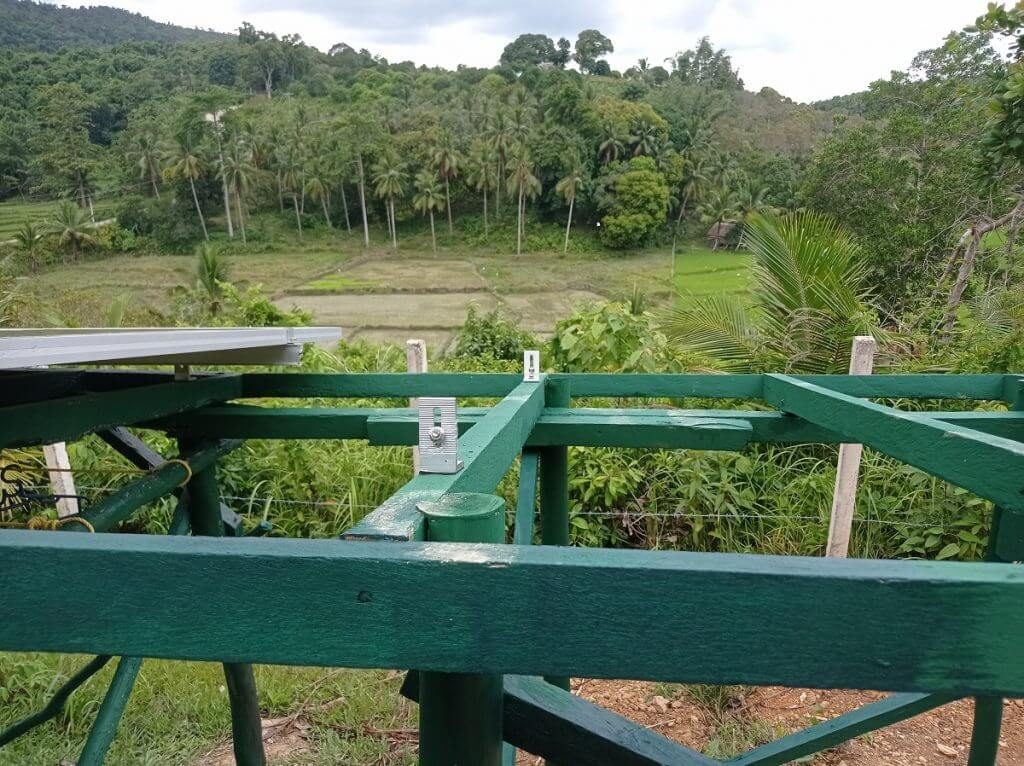
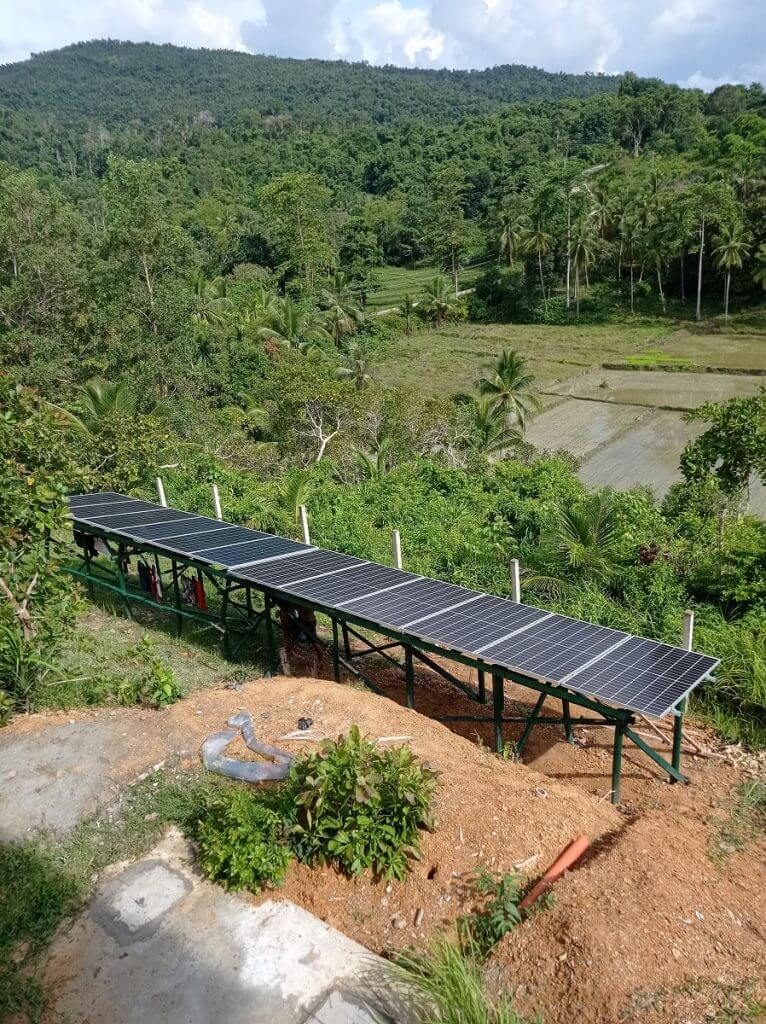
Have a look at the final result:


Real-life scenario
Start by digging your foundations:
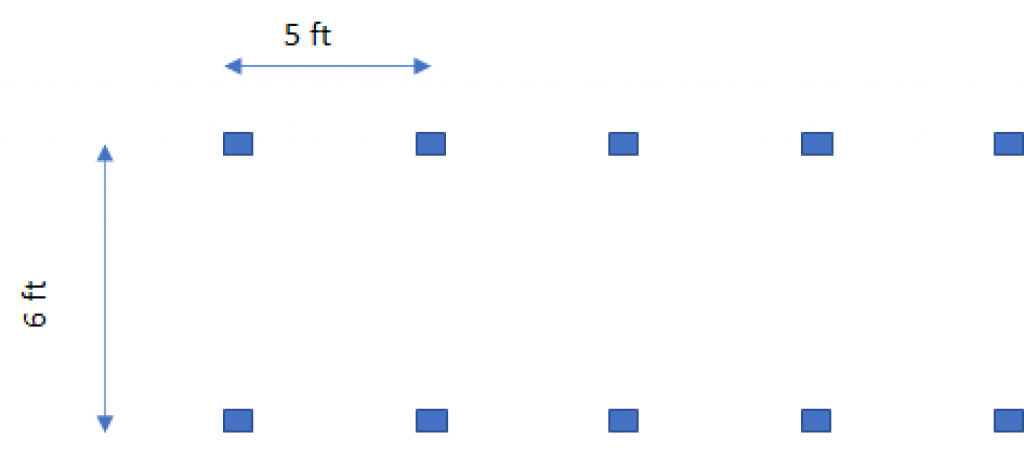
- Dig the foundations for 10 posts. Holes of 1ft x 1ft x 1t are good enough. Install your wood post (straight) and pour the concrete.
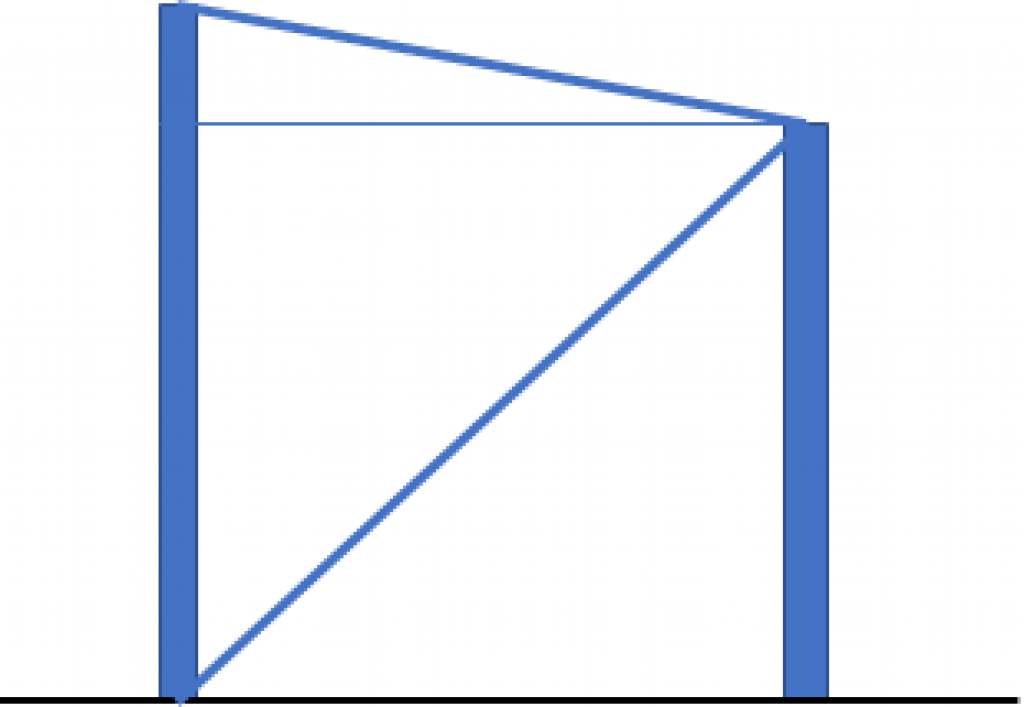
Don’t forget that your solar panels won’t lay flat; they will tilt slightly to receive more sunlight (pictured below). Therefore, your posts won’t have the same length. To determine the ideal tilting angle for your solar panels, check the Global Solar Atlas by entering your location.

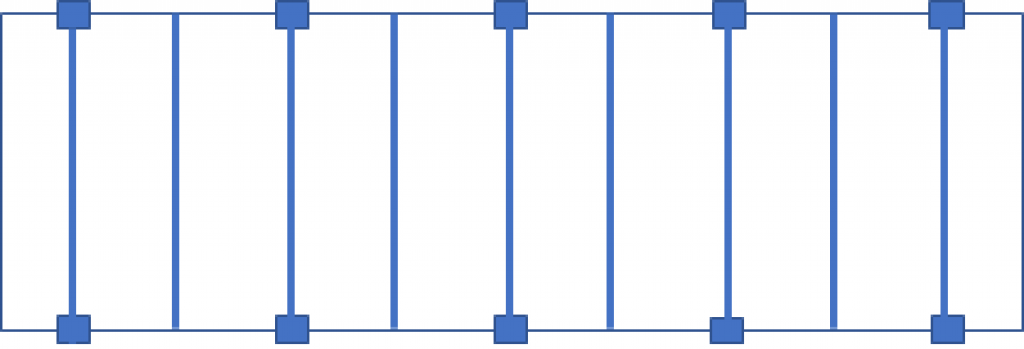
2. Start framing. Using nails or wood screws, connect the top of all the wood posts with the lumbers as depicted below:
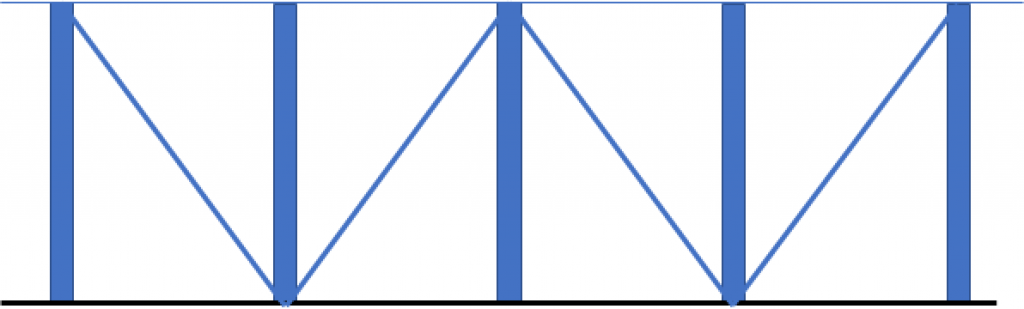
3. Add extra lumber between each post:

4. Reinforce your structure with braces between the posts:
5. Lastly, protect the wood against termites and fungus with borax. Additionally, you can apply varnish or waterproof paint as you wish. Your frame is now ready to welcome your solar panels.
Step 3: Mount Your Solar Panels On The Ground Structure
Key takeaways:
— Solar panels on aluminum rails.
— Get aluminum mounting brackets and clamps.
— Quick and easy installation (30 min for 6 panels).
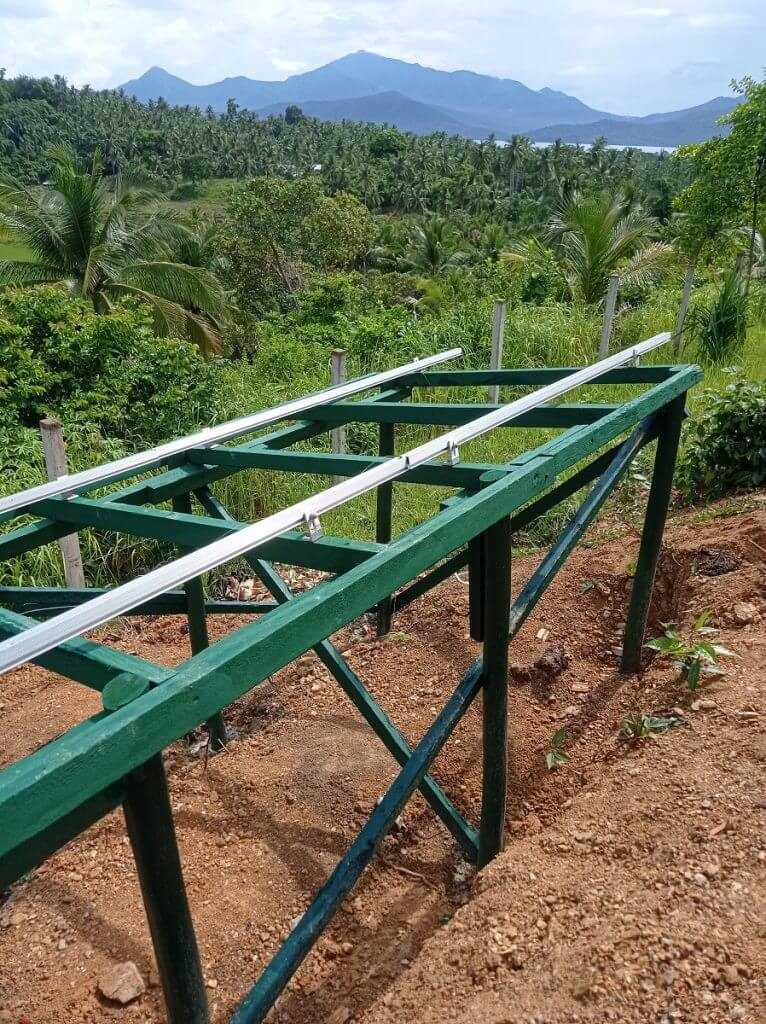
You will mount your solar panels on top of two aluminum rails. Use the following step to install the railings and prepare them to welcome your panels.
To install your solar panels on top of your ground structure, you’ll need the following:
- Aluminum rails for solar panels: 6 x 7ft pieces for 6 x 400W solar panels
- L-shape mounting brackets: 12 pieces
- Mid-clamp brackets: 10 pieces
- End-clamps: 4 pieces
The total cost of the accessories to install 6 x 400W solar panels should be around $150.
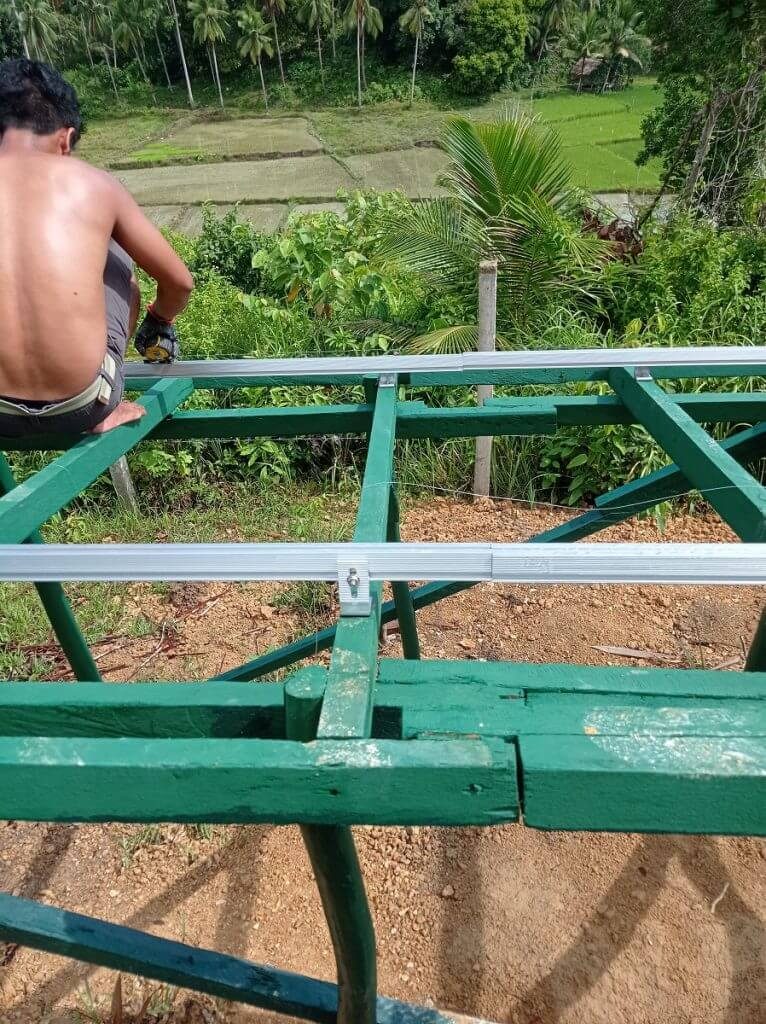
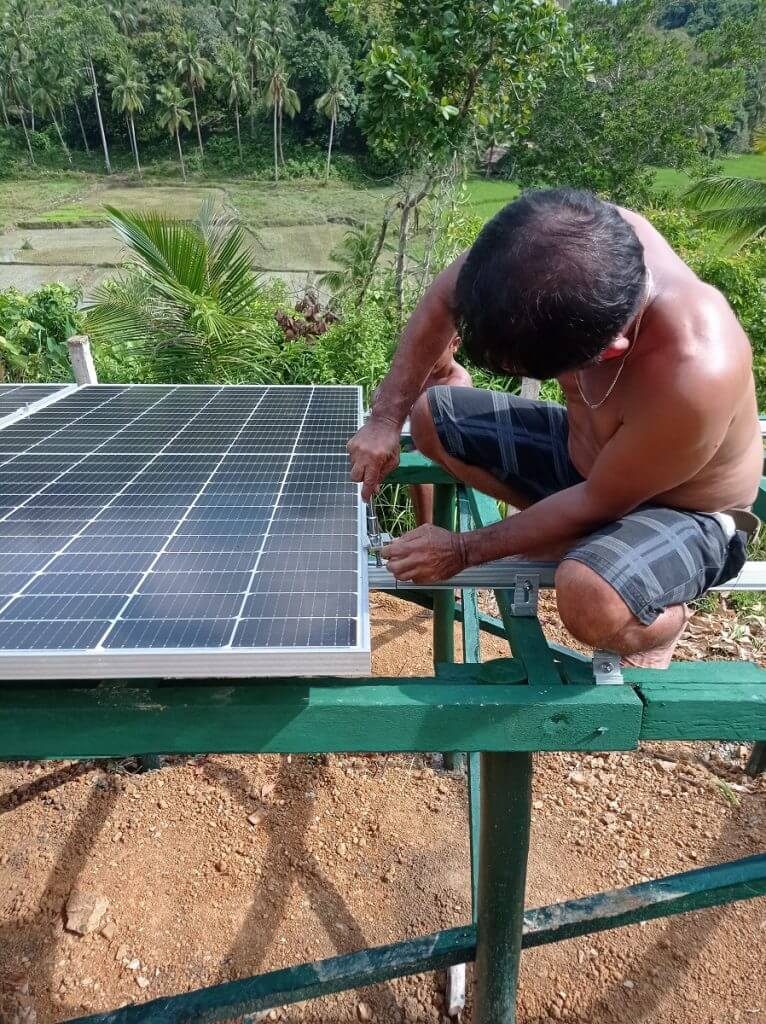
1. Screw the L-shape mounting brackets on top of your frame. Make sure they are perfectly aligned.
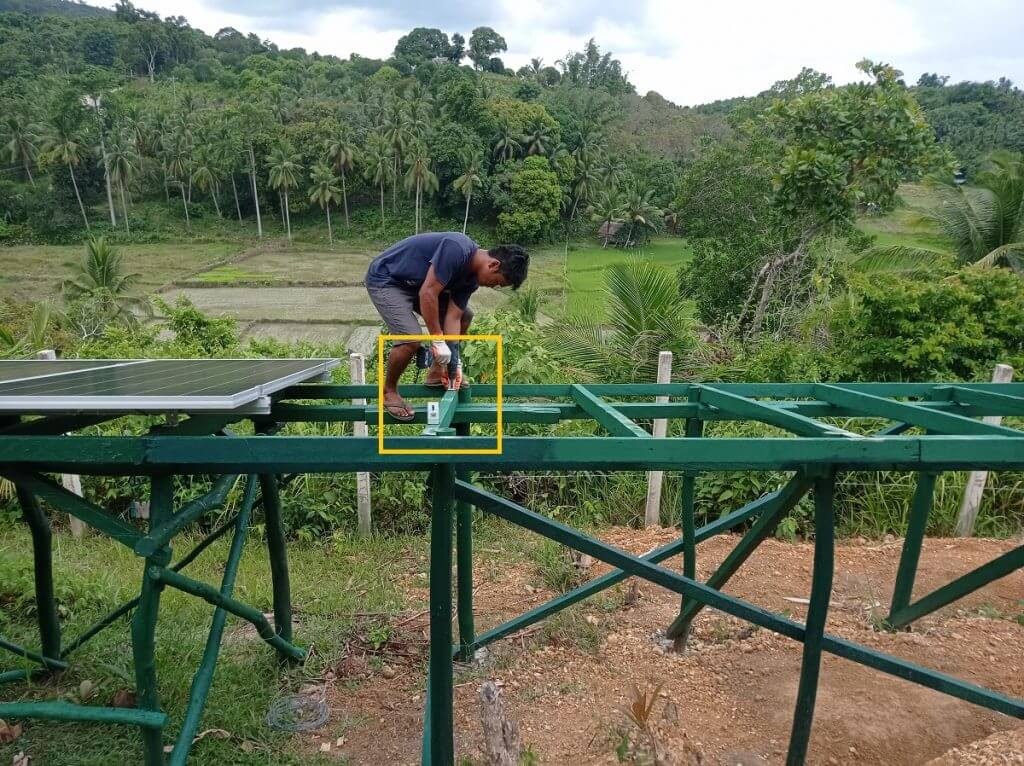
2. Slide the aluminum rails in the mounting brackets and tighten them with a screwdriver. Your frame should look like this:
Time to put the solar panels in place! Carry out the following:
3. Slide in the first two end-clamps.
4. Bring the first panel on top of the railing and push it to the end-clamps.
5. Tighten the end-clamps.

6. Slide in the first two mid-clamps.
7. Bring the second panel and tighten the mid-clamps.
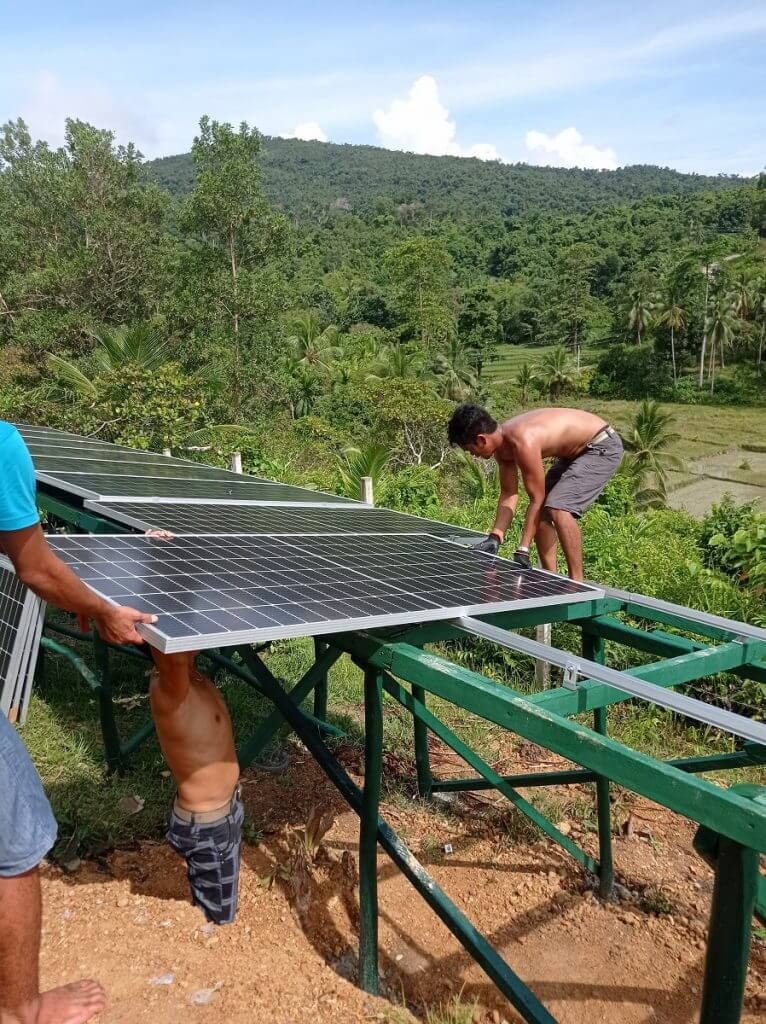
8. Repeat the operation until your last panel is installed.
9. Slide in the end-clamp and tighten.
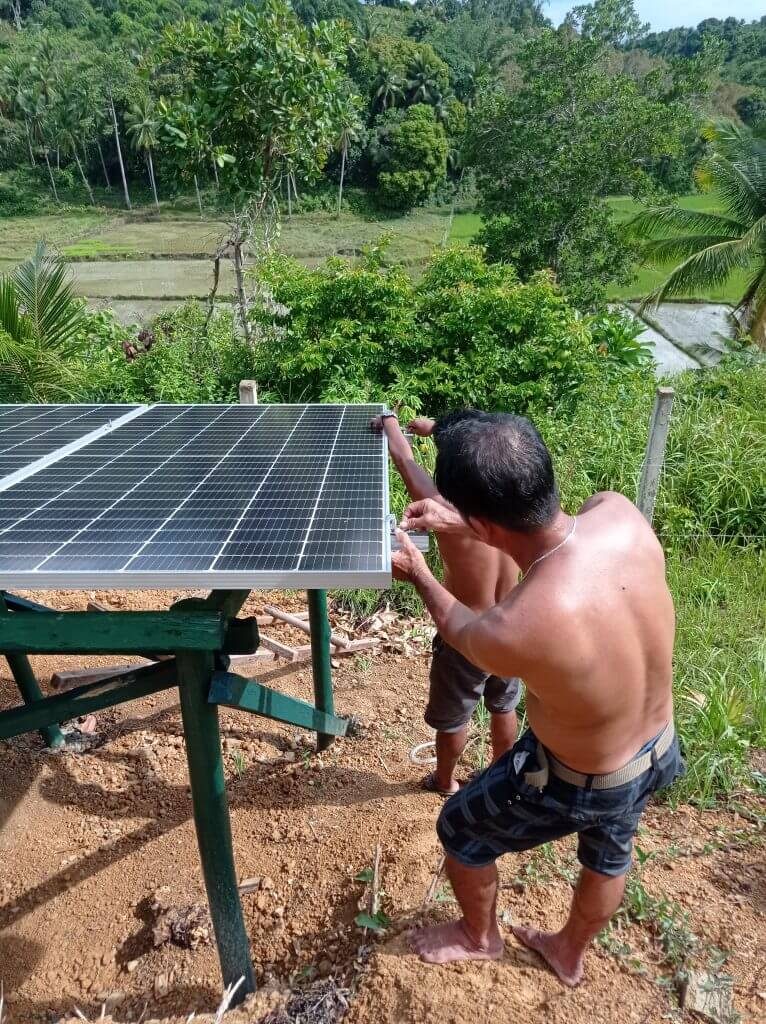
Note to our readers: This process is very easy and takes around 20 to 30 min for 6 solar panels with the help of three people.
Step 4: Connect your solar panels to your inverter
Key takeaways:
— Output of solar panels: Positive (+) and Negative (-) wires.
— MC4 male and female solar connectors.
— Solar cable extension to reach the inverter.
— Grounding lug to ground your solar array.
Now it’s time to connect the solar panels. Don’t worry; standard connectors make this part very easy.
Solar panels produce DC electricity. Therefore, they have two output wires: the positive (+) and the negative (-). You’ll find them at the back of your panel, coming out of a small black box.
You must connect the solar panels in series so the positive wire of one panel connects to the negative wire of the other one.
Note to our readers: Connecting solar panels in series adds their voltage while the output current (Amps) remains the same.
Solar panels use dedicated electrical connectors called MC4 or solar connectors. The MC4 female connector is generally the positive (+) and the MC4 male connector, the negative (-)
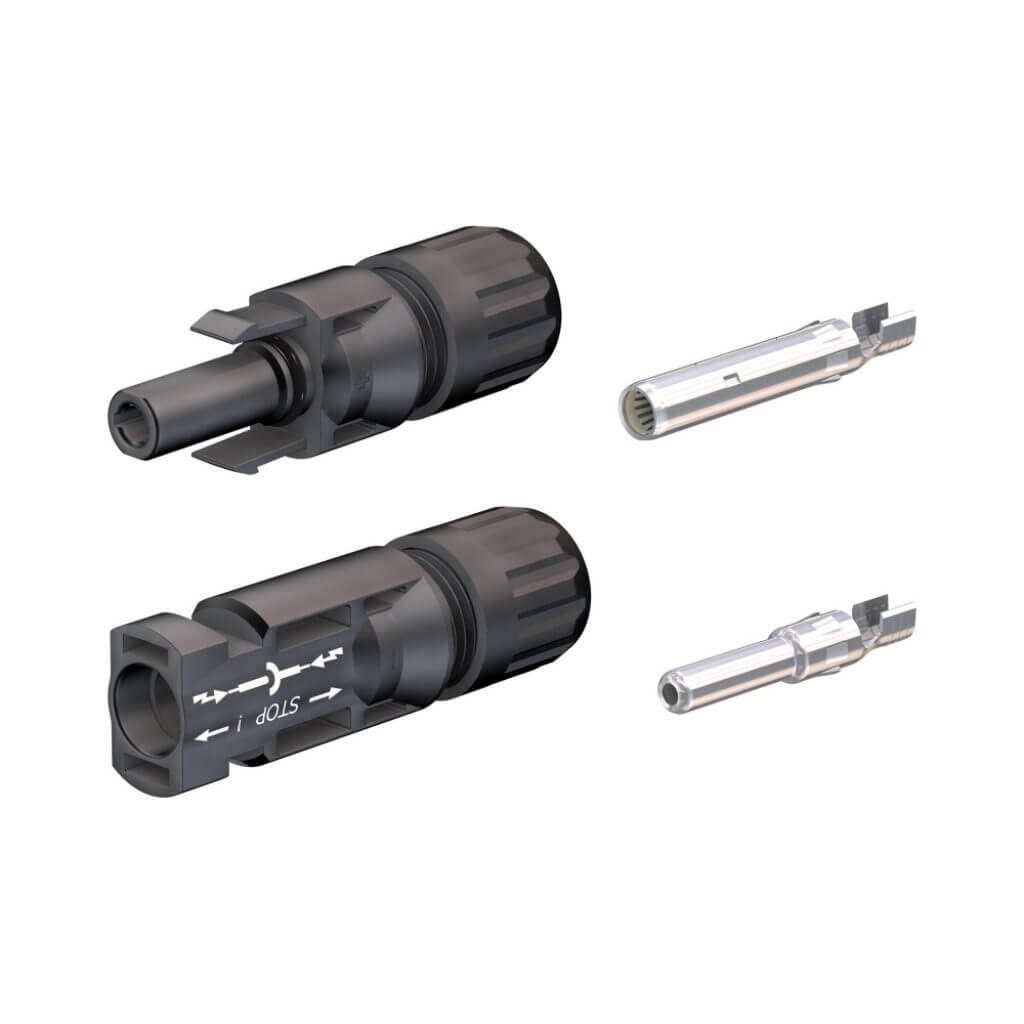
Simply clip the male and female connectors together. The whole operation won’t take you more than 5 minutes.
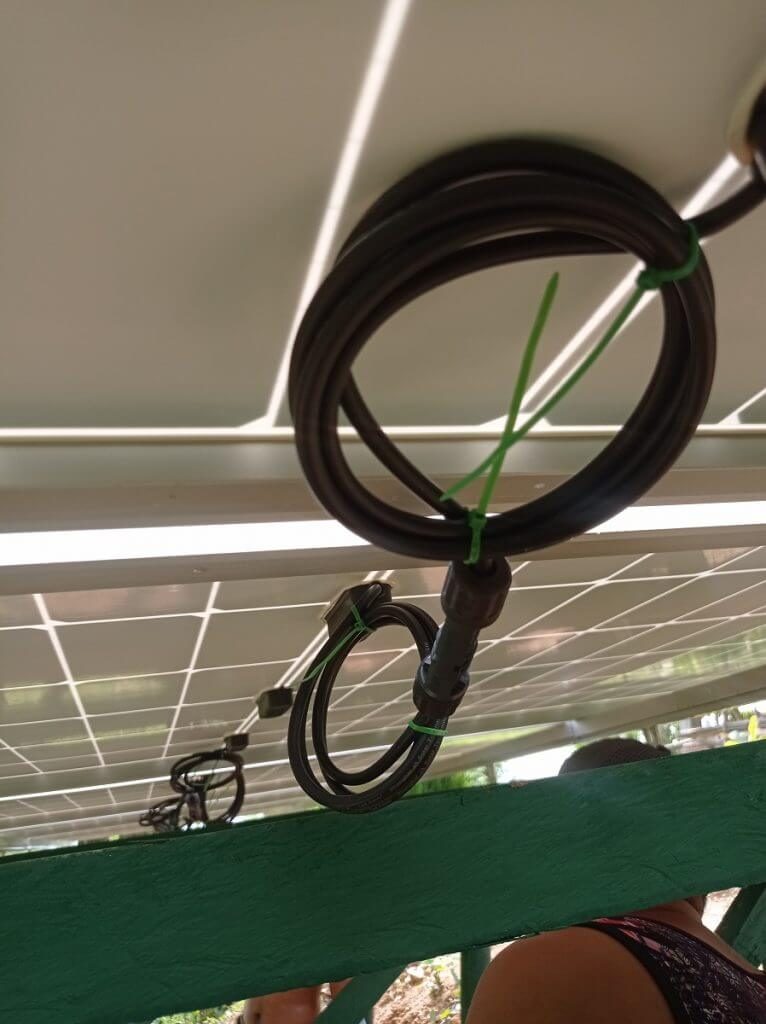
Now that your solar panels are connected in series, you’re left with two wires ending with male and female MC4 connectors. You need a solar extension cable with female and male MC4 connectors.
Simply connect your two solar cables to the extension and plug the extension into your inverter. Again, be sure to pay attention to the polarity (+) and (-).
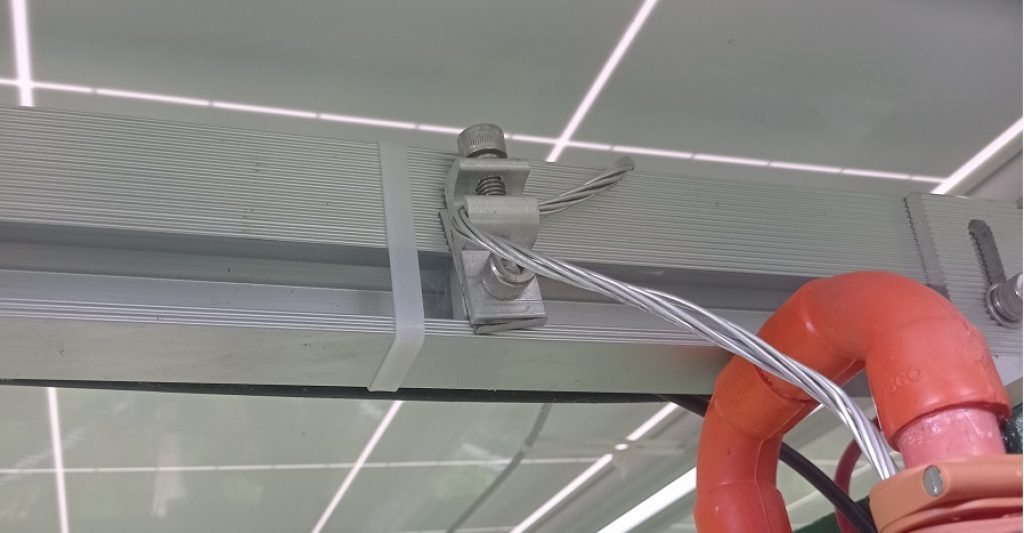
Lastly, you have to ground your solar array to prevent damage from lightning. For that, purchase a grounding lug and a bare large copper or aluminum wire. Mount the grounding lug on your aluminum frame together with the wire. Bring the wire into the ground around 1ft deep.
That’s it! You’re now producing your own electricity from the sun.
Step 5: Maintain your ground-mounted solar panels
Solar panels are extremely robust. They will last at least 25 years and only require light maintenance, such as gentle cleaning from time to time, to keep them at their highest production level.
That said, we recommend you inspect your solar frame every six months to assess its structural integrity.
Related reading: 5 Best SunPower Solar Panels You Can Buy
Are ground-mounted solar panels cheaper?
Ground-mounted solar panels cost the same as rooftop solar panels. If set up by a professional, the installation cost is lower than traditional rooftop panels, but building the ground frame balances the costs.
The maintenance costs of ground-mounted solar panels are low, as you won’t need a professional to climb on your roof to clean the panels. They are easily accessible, and you can do this operation by yourself.
Do ground-mounted solar panels need special planning permission?
Usually, all ground-mounted solar panels need an electrical permit and might also require a building permit depending on the height of the structure or the total surface covered.
In the U.K., you need planning permission if your solar array covers more than 9 sqm.
In the U.S., rules differ from one state to another. For example, in San Diego, California, all solar installations (including ground-mounted) need an electrical permit. However, building permits are only required for ground structures higher than 5 feet.
How much space do ground-mounted solar panels take up?
1 kW of ground-mounted solar panels takes around 5 sq.m or 54 sq. ft.
To estimate the space of your ground-mounted solar panels:
- Check the actual size of your solar panel and calculate its total surface. A 400W solar panel covers roughly 2 sqm or 21.5 sqft.
- Allow an extra 20% space to move easily around the structure.
Are ground-mounted solar panels more efficient?
Ground-mounted solar panels are more efficient than roof-top panels as they produce more solar energy.
This is mainly due to better air circulation that cools down the panels (cooler panels lead to higher solar production) and an optimized tilting angle and orientation, as you are not dependent on your roof orientation and slope.
What are the pros & cons of ground-mounted solar panels?
Below are the positives and negatives of ground-mounted solar panels:
Related reading: Solar Panel Racking (All you need to know about mounting)
Final thoughts
Ground-mounted solar panels are highly recommended – they are fast to install, maintenance is not a burden, and they produce more energy than traditional rooftop panels.
Follow this guide, and with the help of 3 people, it will only take you 3 days to install six 400W solar panels (2.4kW), including the ground structure.
To conclude, remember that the space below the panels is still usable. For example, in France, they developed the concept of agrivoltaics, which combines vineyards with solar energy production. The result shows that the crop benefits from partial shading, and the farmers receive an extra income through their solar energy production.
Don’t hesitate to use ground-mounted solar panels if you have a sunny place on your property.