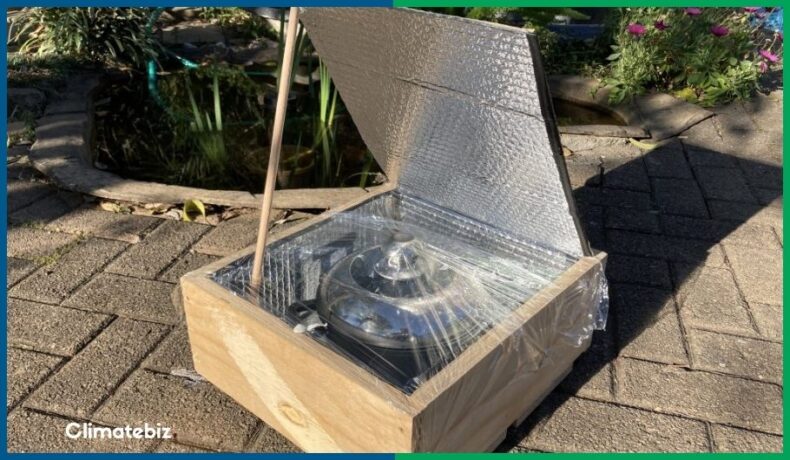
A DIY Solar Cooker allows you to enjoy hot food anywhere off-grid; it’s a portable and low-cost method to cook food while out and about. You can slow cook stew, make soup, or even heat hot dogs — all with solar energy!
The easiest way to get your hands on a solar cooker is to make one yourself. Truthfully, the project’s complexity depends on your level of ambition. You can have a simple solar cooker that does the job or an intricate one with sliding drawers.
But let’s bit waste any more time; we’re here to teach you how to make a durable DIY solar cooker. All you’ll need is wood, cardboard, a car windshield sun protector (and a few tools along the way).
Table of Contents
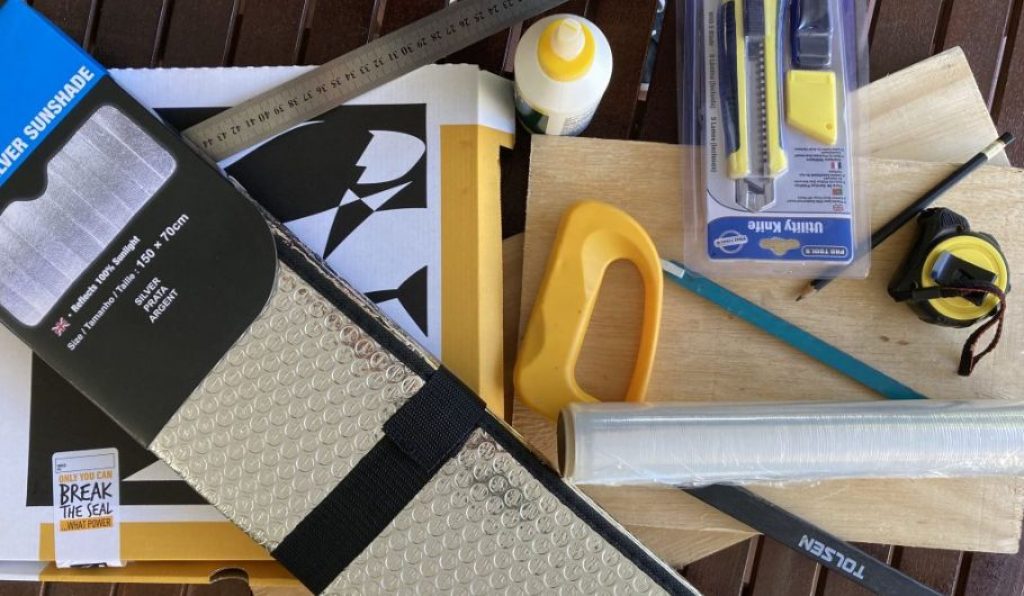
Tools Needed To Make a DIY Solar Cooker
| Tool | Description | Purchase |
|---|---|---|
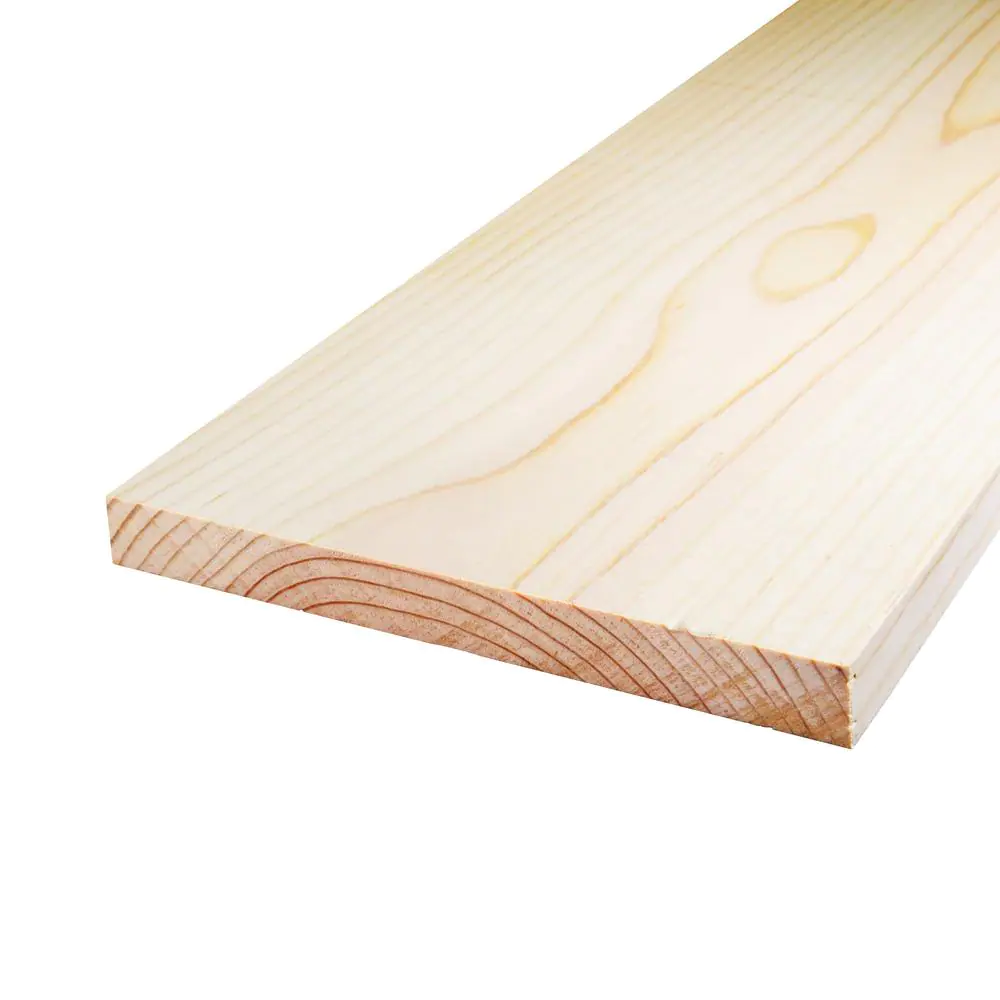 | Wood We used wood that was about an inch thick. The thickness doesn’t matter; just choose something sturdy enough to support a cooking pot. We’ll use wooden planks for the sides and bottom of the solar cooker. | Home Depot |
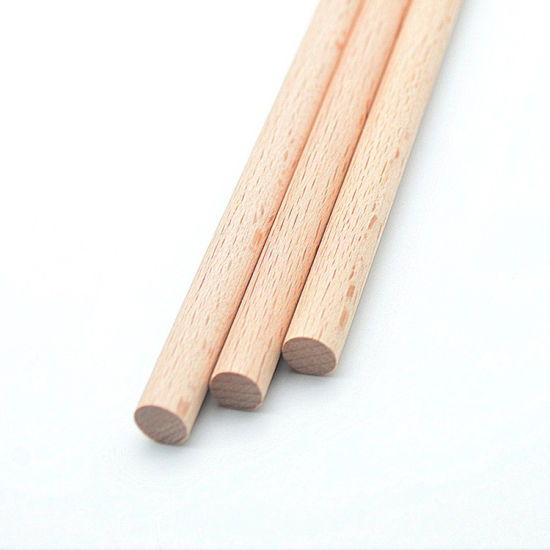 | Dowel Stick The dowel stick is used to prop the lid of the cooker open. We used a 3/16 inch dowel, but you could use something thinner. The length of the dowel stick will depend on the angle of the solar cooker. We used no more than 12 inches. | Home Depot |
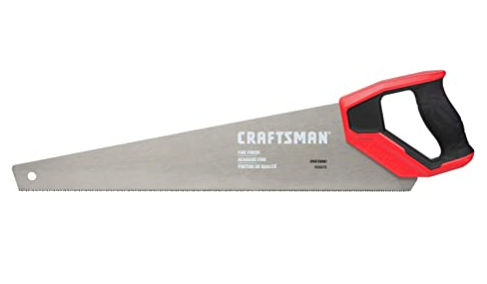 | Wood Saw You’ll use the wood saw to cut the wood to the correct size. There’s no specific saw you’ll need, choose whichever suits your budget. | Amazon |
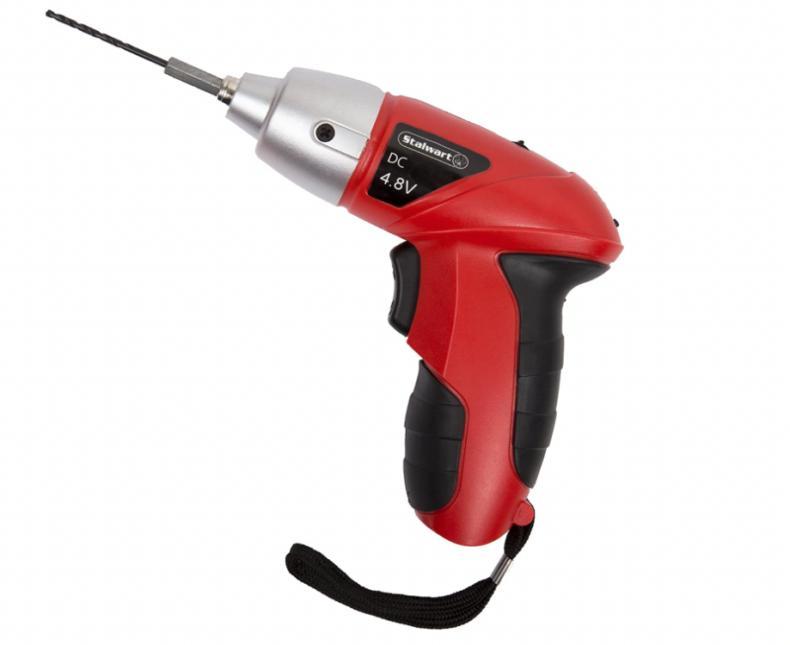 | Electric Screwdriver You’ll need an electric screwdriver to attach the wooden components together. While it’s unnecessary, we highly recommend making the job easier. | Amazon |
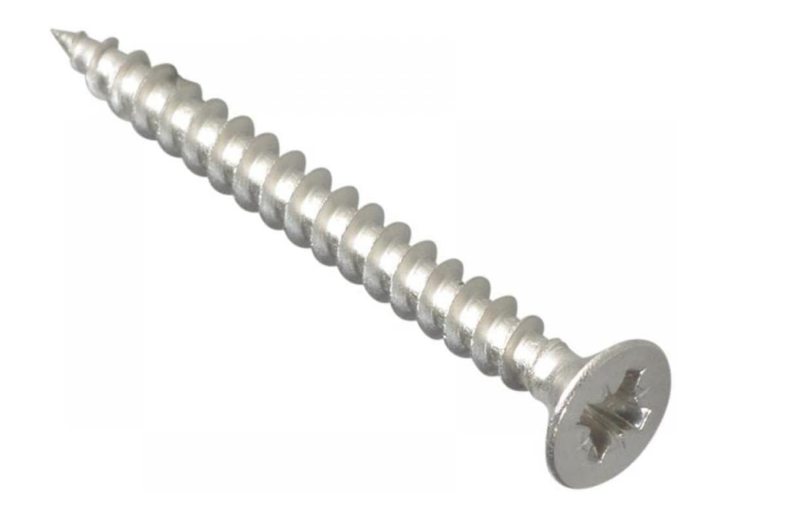 | Screws Any screws will do the job, just ensure that they’re long enough. The screw needs to go through one plank and tap deep enough into the other. | Amazon |
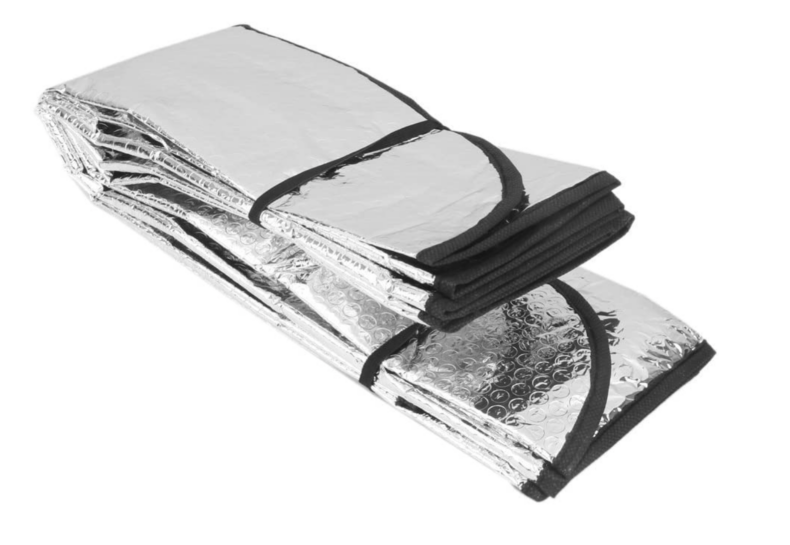 | Car Windscreen Sun Protector While aluminum tinfoil works perfectly for a solar cooker, we decided to step it up a notch. Using a car windscreen sun protector is more efficient and increases the inner insulation of the solar cooker. | Amazon |
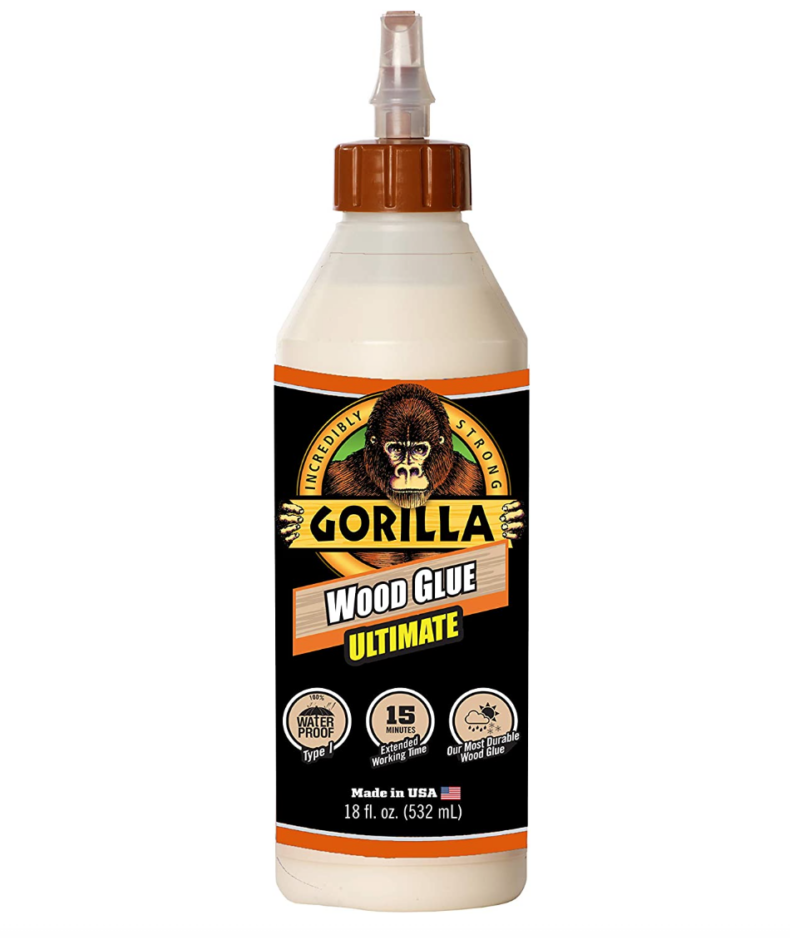 | Wood Glue You’ll need to glue to windscreen sun protector and cardboard to the wooden sides. Wood glue is the best and cheapest option in this case. | Amazon |
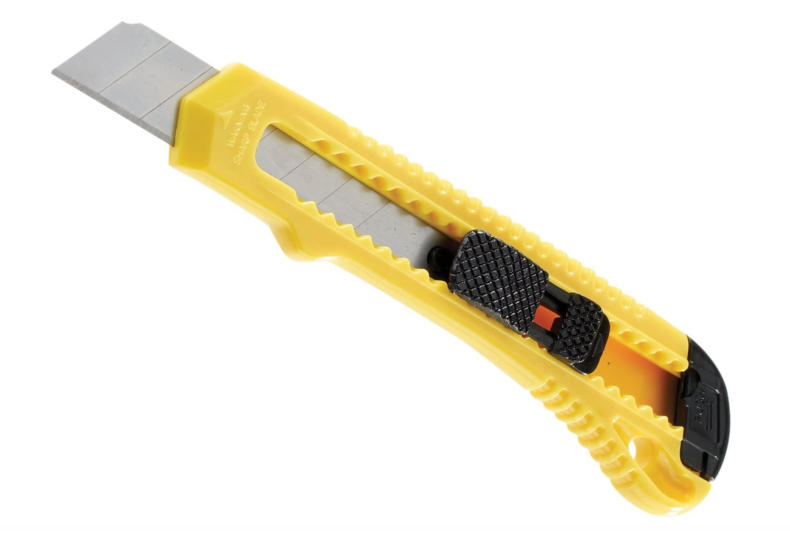 | Stanley Knife Also known as a craft knife, a Stanley knife will allow you to cut through the cardboard and windshield protector with use. Alternatively, a pair of scissors will work just fine. | Amazon |
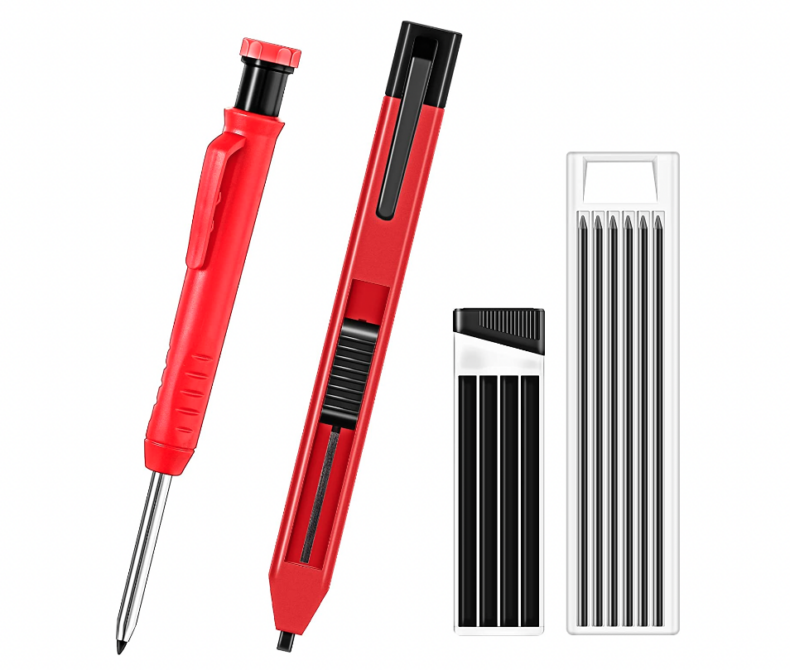 | Pencil You’ll need a pencil to mark where to cut the wood so use a soft pencil for darker lines. We recommend a builders pencil or a 4B – 6B pencil. | Amazon |
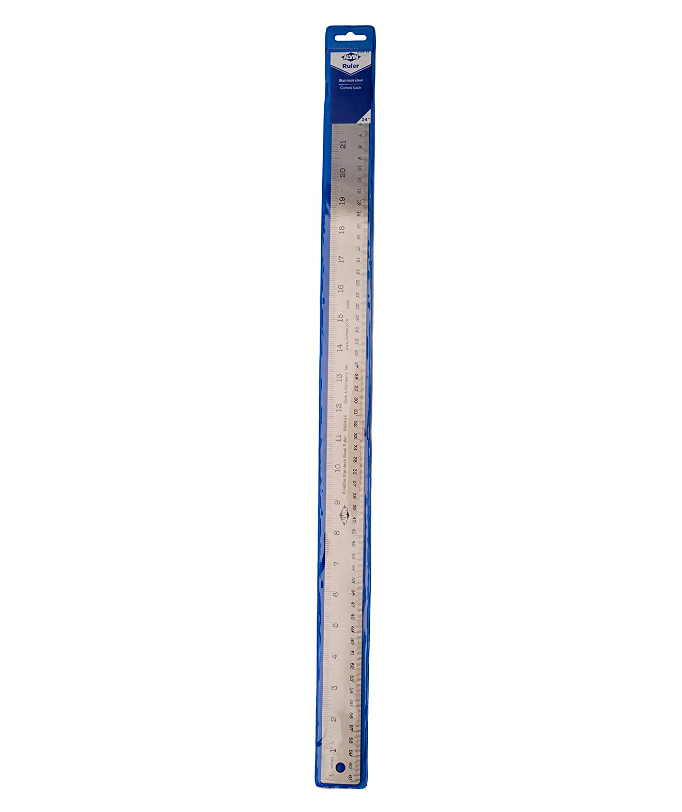 | Ruler We used a long steel ruler. These rulers are more durable when working with DIY projects. This ruler is 24″ long. | Amazon |
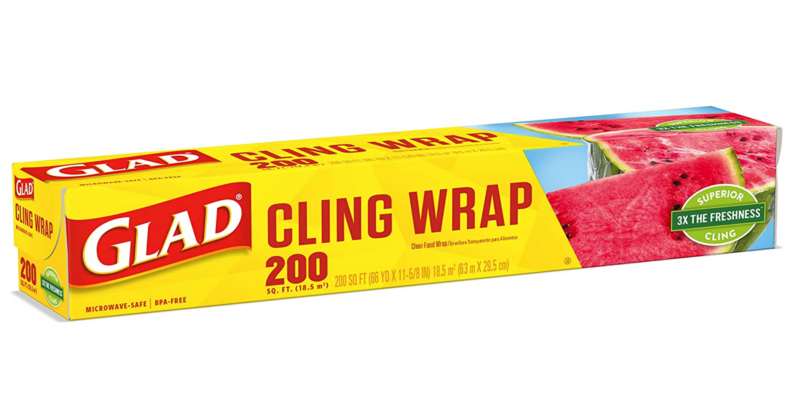 | Plastic Wrap You’ll use plastic wrap to cover the top of the solar cooker. This will keep the warm air inside and create a greenhouse effect. Alternatively, you can use a sheet of glass as a sustainable and permanent option. | Amazon |
 | Cardboard Box You’ll need the cardboard box to create the top flap of the solar cooker. While you can also use wood, we opted for cardboard for simplicity’s sake. | Recycled |
Related Reading: How To Make DIY Solar Lights For Your Garden
How To Build A DIY Solar Cooker
Building a DIY solar cooker can be as straightforward or as complicated as you’d like to make it. It’s a science project you can make at a high school level or a professional DIY build for outdoor cooking. In the end, the difference comes down to the amount of effort you put in.
There are 6 steps you’ll need to follow to build a DIY solar cooker. These include:
- Planning
- Measuring and cutting the wood
- Joining the wood
- Cutting all the cardboard and windshield components
- Assembling the solar cooking
- Adding the finishing touches
- Using the solar cooker
This is an intermediate-level DIY project. It requires some wood cutting, but other than that, you’ll find the process to be pretty straightforward.
Step 1: Plan
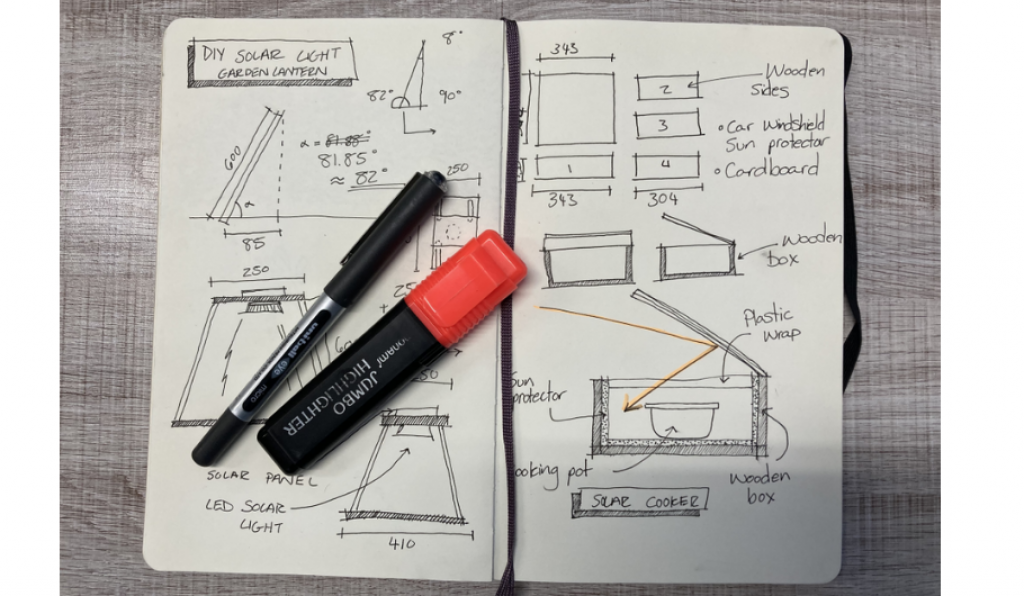
DIY projects always require a good bit of planning. Without a solid plan, your project can go sideways quickly. In this case, you’ll need to plan out the amount of wood you’ll require and the sizes of your cardboard.
The best way to do this is to sketch a design for your DIY solar cooker in a notebook or on some rough paper. Don’t worry if your drawings aren’t masterpieces; you just need to put your ideas down on paper.
Once you have a plan, you’ll better understand your solar cooker’s appearance and dimensions.
Next, gather your materials together; it’s time to start building!
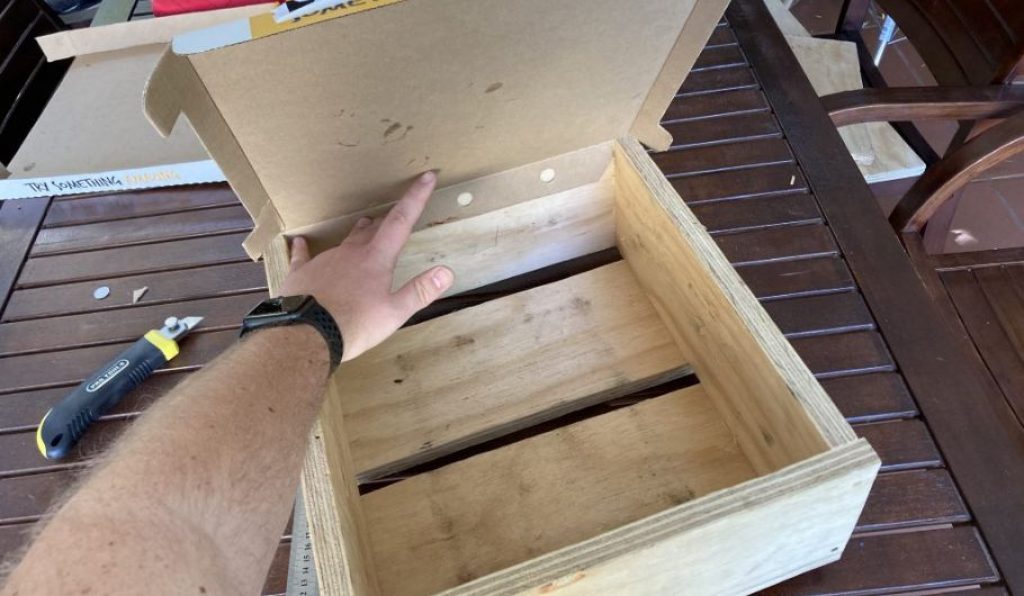
Step 2: Measure And Cut The Wood
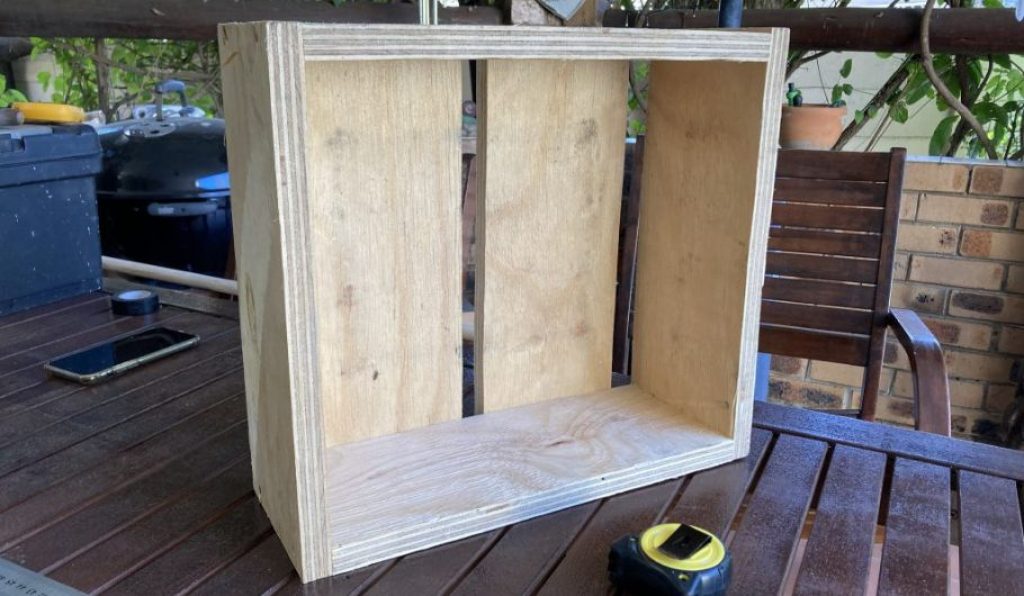
The next step is to create the box where you’ll place your cooking pot. This piece acts as the center and main body of your solar cooker, so it needs to be sturdy — hence why we recommend using wood.
To create the box, measure out 4 sides onto your wood planks. You can make your cooker square or rectangle; it’s entirely up to you. The size of our box is 12” x 12”.
Using these dimensions, measure and cut the base of your solar cooker.
Lastly, the height of your box will depend on the size of your pot. Our box is 7” in height.
Step 3: Joining The Wood
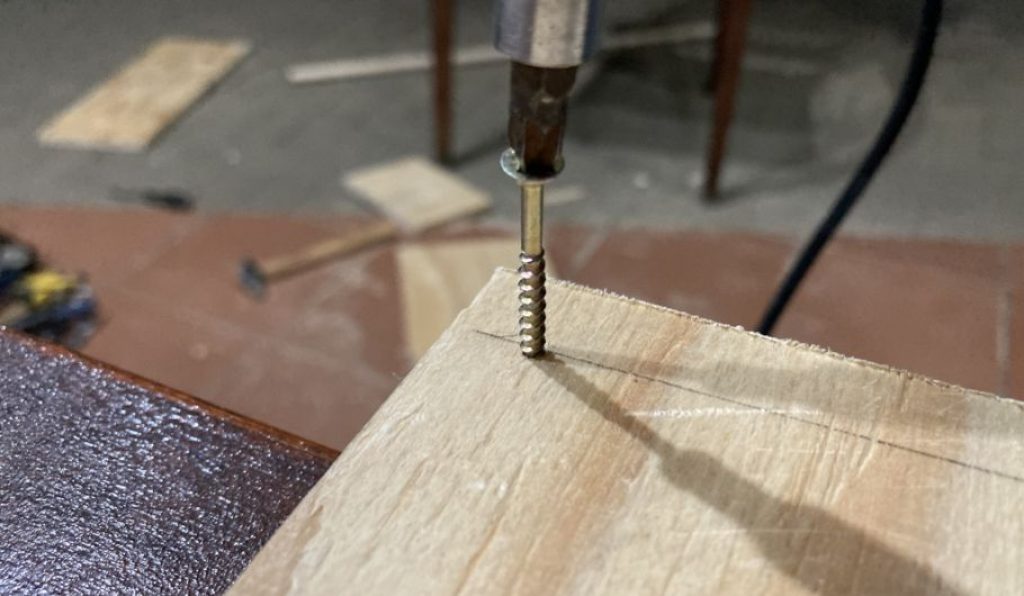
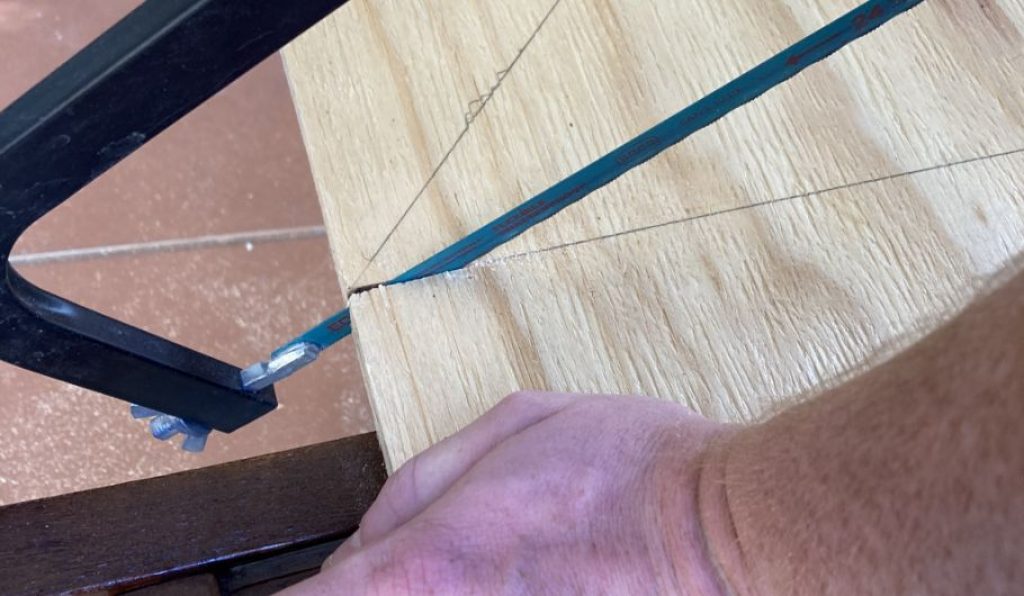
It’s best to finish up with the woodwork side of things before you move on to working with the other materials. For this step, you’ll need your electric screwdriver.
Using your pencil, mark holes on each corner of one of the side planks. Then, drill a pilot hole using a screw and the electric screwdriver. Next, hold one plank against the other plank at a 90º angle and fix them together with the screws. You may need an extra hand to make this step easier.
Repeat this step until all 4 planks are connected into a square shape. Lastly, add the base to the box using the same technique as above.
As you’ll see in our pictures, we were short on wood. So we fixed 2 strips to the bottom before gluing cardboard over them to make a sturdy base.
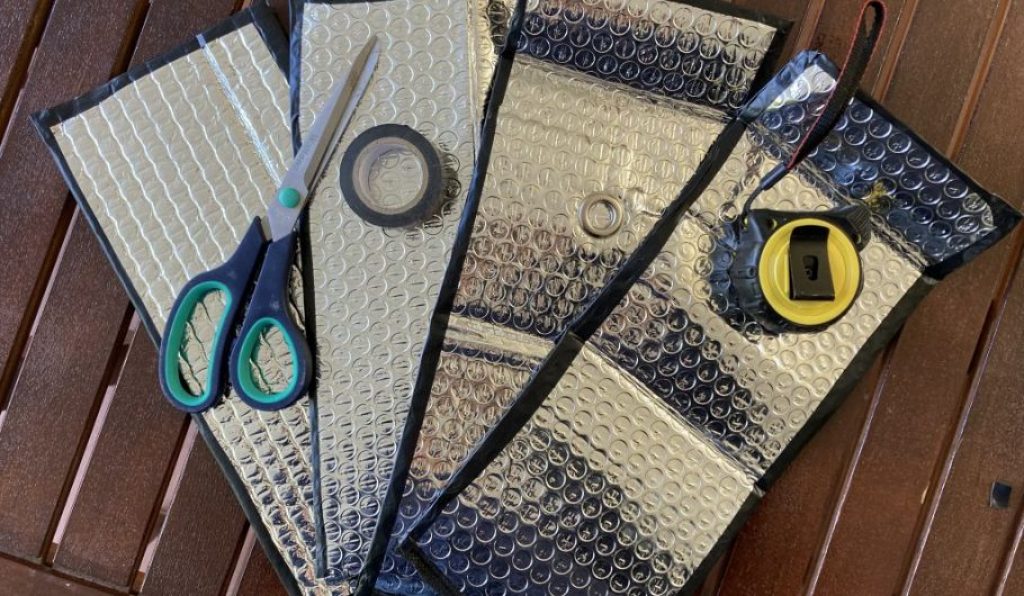
Step 4: Cut Your DIY Solar Cooker Components
Now it’s time to cut the cardboard and the car windshield sun protector. You’ll use the cardboard to make the top of your solar cooker; the windshield sun protector will cover the sides.
The cardboard you use can be anything you find on your recycling pile. For example, we used an empty pizza box. First, cut the right amount of cardboard so that it’s long enough to cover the top of the wooden box. When doing so, leave a piece on one side of the top flap to glue to the wooden box. It’s also best to have the cardboard lid overlap the wooden box so the flap has something to rest on.
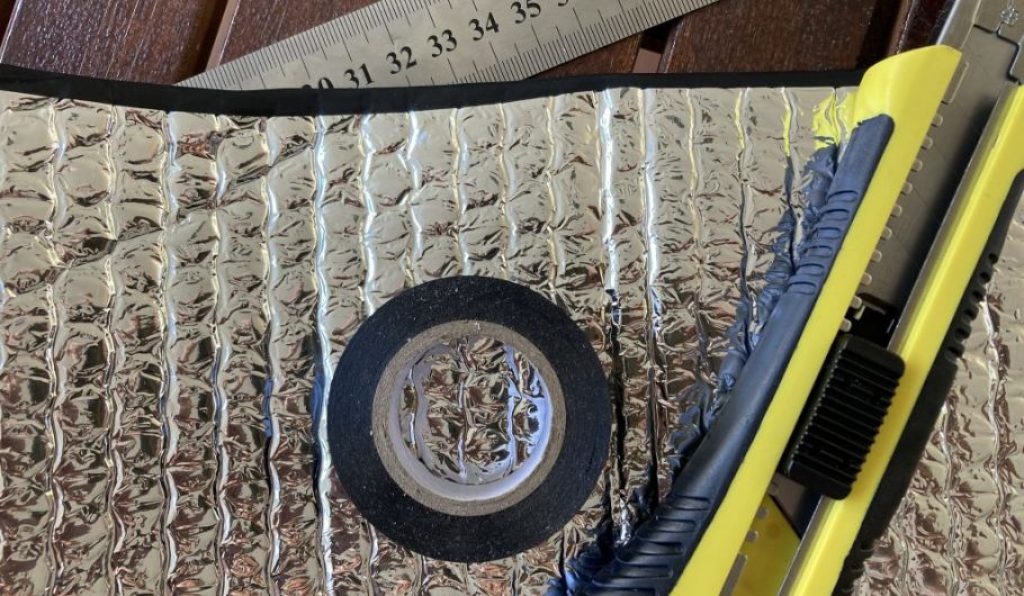
Cut The Car Windshield Sun Protector
Next, cut the windshield protector to cover the following surfaces:
- The cardboard flap you just cut out;
- All four inner sides of the solar cooker; and
- The bottom of the solar cooker.
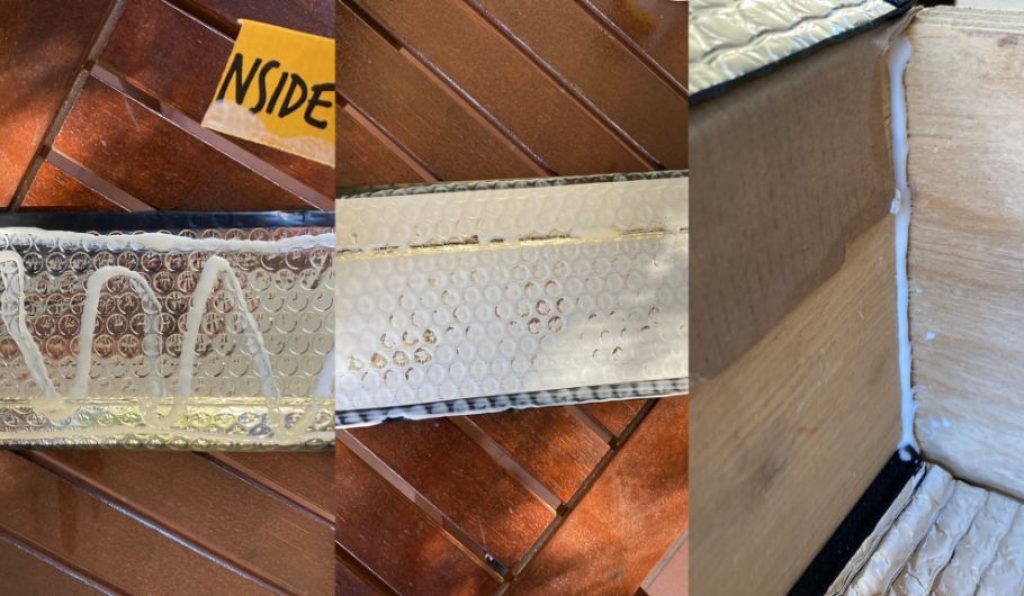
Once you’ve cut the windshield protector, use insulation tape to tape up the edges; this will give them a finished look and make them easier to glue together. Moreover, it’ll increase your solar cooker’s insulation levels.
Step 5: Assemble The Solar Cooker
Start by gluing the cardboard flap to the wooden box. Doing this first is essential as the flap will stick better to the wood than the windshield sun protector.
Next, cover each side of the solar cooker with its respective windshield protector piece. You’ll notice that because of how we fixed our wooden sides, the two sides are slightly smaller than the other.
Use heavy items like books or ornaments to keep the sides in place while the glue dries. Additionally, if you apply thin layers of glue, it’ll dry quicker. To do this, use a scrap piece of cardboard to smear the glue across the surface in a thin layer.
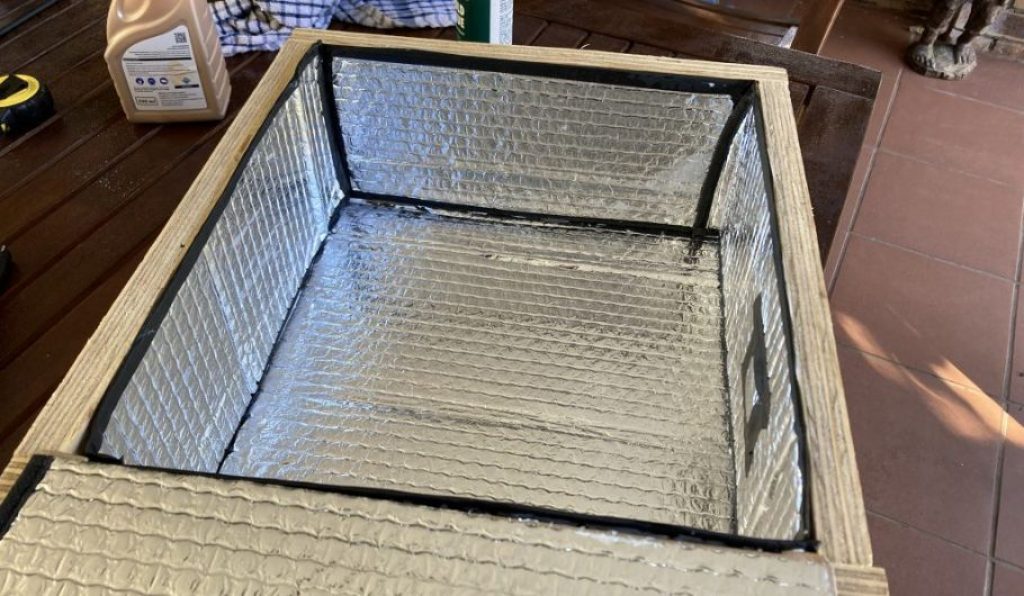
Pro tip: apply glue to the corners of the wooden box before sticking it in the windshield sun protector. This will ensure the sides stick to the wood correctly without peeling away.
Step 6: Finishing Touches
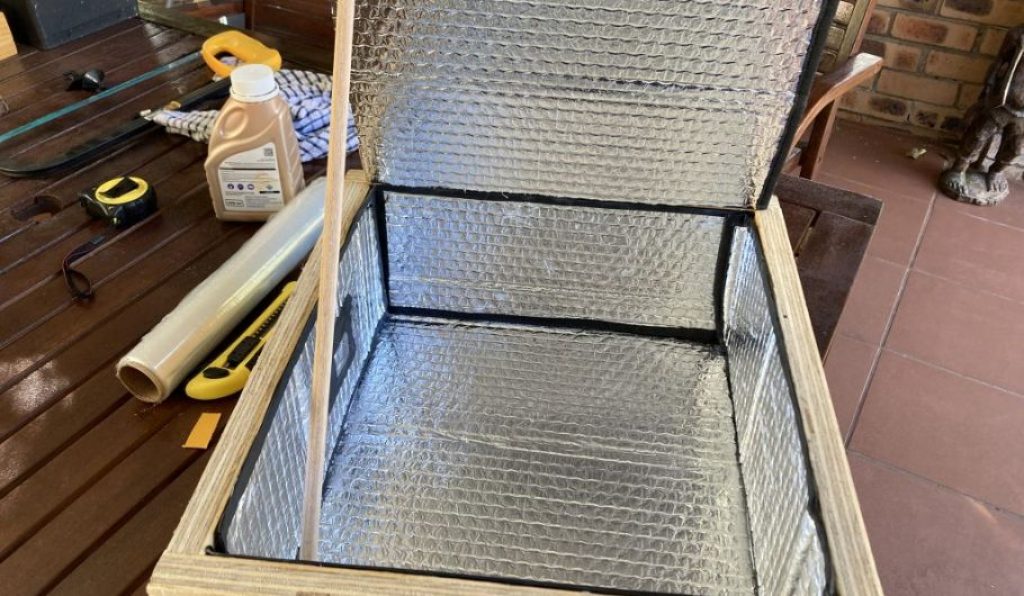
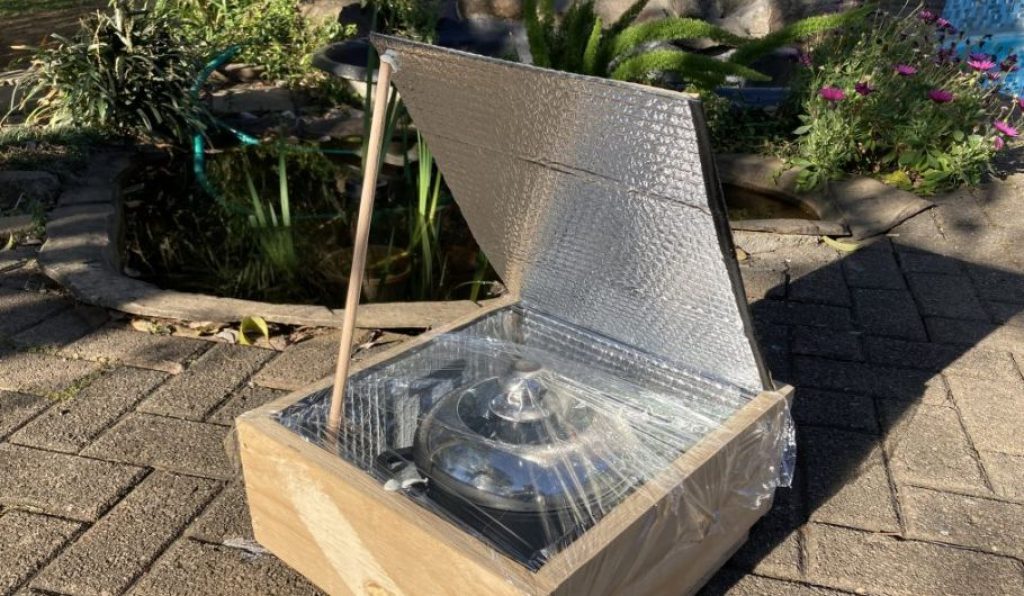
The final step is to add the finishing touches to your DIY solar cooker. You’ll need to make a stand that holds the top flap at the right angle and cover the box with plastic wrap.
To make the stand, cut a thin piece of dowel which you can use to prop the flap up. To determine the length of your stand, measure the highest angle you’d position the flap; this is the length between the front corner of the solar cooker and the back corner of the top flap.
Using The Solar Cooker
Lastly, place the cooking pot in the center of the solar cooker and cover the box with plastic wrap. The plastic wrap will catch the heat and trap it within the cooker, creating a greenhouse effect.
Place the solar cooker in direct sunlight, and position the tap flap to reflect the sun into the box. It won’t be long before your solar cooker starts doing its job — cooking your food!
Related Reading: Best Solar Generator for Camping (2022) – Reviews and Buyer’s Guide
A Glass Top Variation
You can use a glass panel instead of plastic wrap to create the greenhouse effect. It’s renewable and better for the environment. However, the only downside is that it makes the project a little more complex, and the glass panel can break easily.
You’ll need to add a lip to the wooden box for the glass to rest on. In addition, you’ll need a glass cutter to cut your piece of glass to size.
Related Reading: 10 Off-Grid Heating Methods To Use (With no electricity)
Final Thoughts
We hope you’re proud of how your DIY solar cooker turned out. We enjoyed doing this project and found that the design worked perfectly.
The solar cooker produced hot water within the hour, and we can’t wait to use it on our next camping trip.
If you have any alterations to the design, we’d love to hear them. Alternatively, if you’ve tried this out, share the results in the comments below!
Follow us on Twitter for more DIY projects and green tech news!