
Most solar backup systems that disappoint their owners were not badly built. They were badly sized. An undersized battery dies at 3 AM on the second cloudy day, while an oversized one ties up thousands of dollars in capacity that never gets used.
The first decision shapes everything else: do you want to keep a few essential circuits running during an outage, or do you want the whole house to carry on as if nothing happened? The answer can change the size and cost of a system by a factor of three or more.
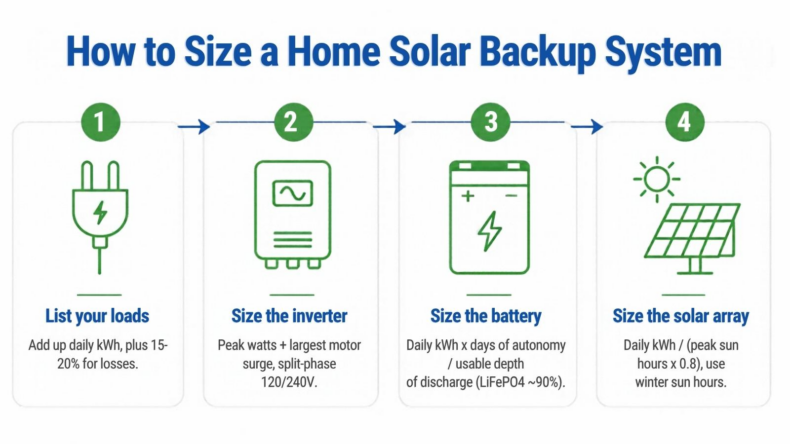
This guide walks through the four sizing steps in order – loads, inverter, battery, and solar array – with two worked examples at the end.
Table of Contents
Step 1: List your loads and estimate daily energy use
Everything starts with a load list. For each device you want powered during an outage, write down its running wattage and how many hours a day it will run. Multiply the two to get watt-hours (Wh) per day.
The nameplate label on an appliance usually shows its maximum draw, not its average. A refrigerator rated at 700 W might average 100-150 W across a day because its compressor cycles on and off. A plug-in energy meter or your utility’s smart-meter data gives far more accurate numbers than labels.
| Load | Running watts | Hours per day | Daily energy (Wh) |
|---|---|---|---|
| Refrigerator (cycling average) | 150 | 24 | 3,600 |
| Furnace blower fan | 500 | 8 | 4,000 |
| Well pump (1 hp) | 1,000 | 2 | 2,000 |
| LED lighting (10 bulbs) | 100 | 6 | 600 |
| Internet router + laptop | 80 | 10 | 800 |
| Phone and device charging | 50 | 4 | 200 |
| Total | 1,880 | 11,200 |
Step 2: Size the inverter for peak and surge power
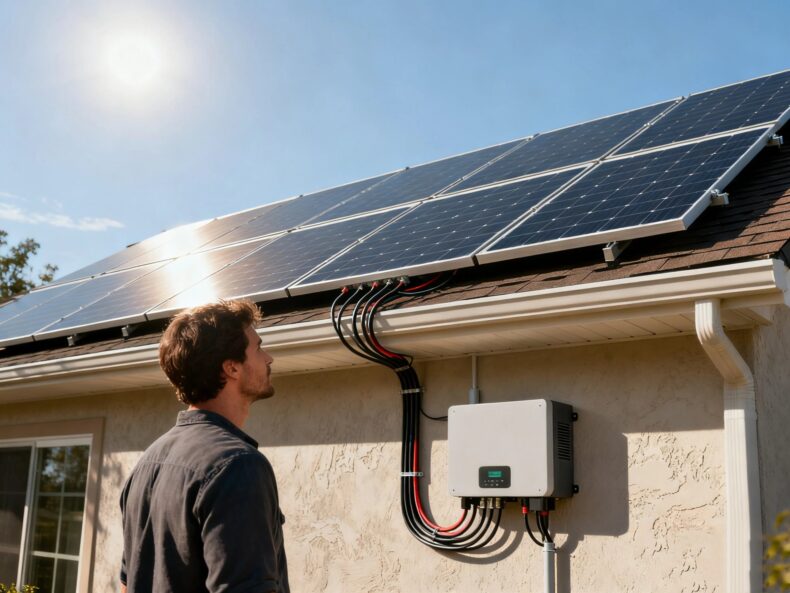
The inverter limits how much power you can draw at the same moment, so it is sized from wattage, not daily energy. Add up the running watts of everything that could be on at once, then check the largest motor load.
Motors and compressors draw a brief surge when they start – often 2-3 times their running watts, and up to 5-6 times for some well pumps and older air conditioners. The inverter’s surge rating must cover the biggest motor’s start-up on top of the other loads already running.
Three checks before you choose a unit:
- Continuous rating: at least 25% above your expected peak running load, so the inverter isn’t working at its limit for hours.
- Surge rating: high enough for the largest motor start. Low-frequency inverters with heavy transformers generally handle surges better than high-frequency models of the same continuous rating.
- Voltage: most North American homes need 120/240 V split-phase output to run 240 V loads such as well pumps, dryers and central air. A 120 V-only inverter can only back up 120 V circuits.
For an essential-loads system, a 3-6 kW inverter is common. Whole-home backup usually starts around 8 kW and can reach 12-15 kW or more for houses with electric heat or several large motors.
Step 3: Size the battery for the hours you need to cover
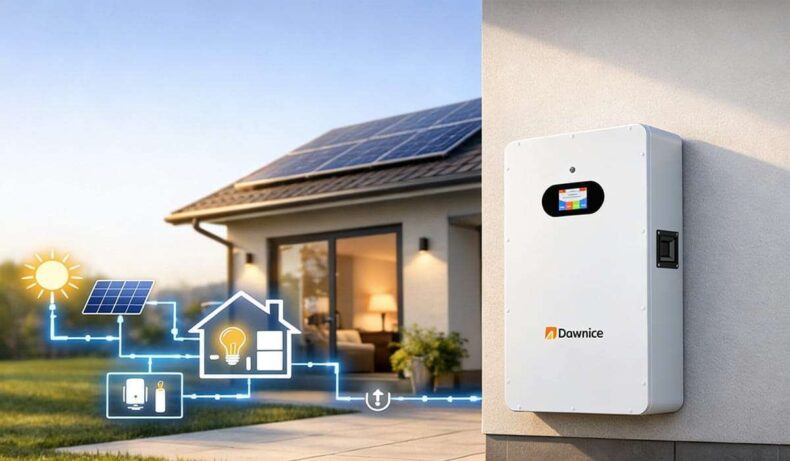
Battery capacity decides how long you can run without sun or grid. Start from your adjusted daily energy figure and decide how many days of autonomy you want.
- Grid-tied with backup: 1 day of storage is usually enough, because outages are typically short and the panels recharge the battery each sunny day.
- Off-grid or frequent multi-day outages: plan for 2-3 days, especially in winter or in cloudy regions.
Then account for usable capacity. Lithium iron phosphate (LiFePO4) batteries can safely use 80-90% of their rated capacity and last 3,000-6,000 cycles. Lead-acid batteries should stay above 50% charge to avoid shortening their life, so they need roughly twice the rated capacity for the same usable energy.
Battery size (kWh) = Daily energy (kWh) x Days of autonomy / Usable depth of discharge
For the 13 kWh essential-loads example with one day of autonomy and LiFePO4 at 90% usable capacity, that works out to about 14.5 kWh of battery. With lead-acid at 50%, the same job needs about 26 kWh.
Step 4: Size the solar array to refill the battery
The array has to replace each day’s energy, so it is sized from daily kWh and your location’s peak sun hours – the number of hours per day the sun delivers the equivalent of 1,000 W per square meter. Across most of the US this ranges from about 3 in the Pacific Northwest and Northeast to 6 or more in the Southwest.
Array size (kW) = Daily energy (kWh) / (Peak sun hours x 0.8)
The 0.8 factor covers real-world losses from heat, dust, wiring and charge-controller efficiency. NREL’s free PVWatts calculator gives location-specific sun-hour figures by month.
Size for your worst season if you rely on solar during outages. A system that refills the battery in July may only cover half the load in December, when sun hours can drop by 40-50% in northern states. For the 13 kWh example, 4.5 summer sun hours call for about 3.6 kW of panels, while 3 winter sun hours call for about 5.4 kW.
Also check that the charge controller or hybrid inverter can accept the array’s voltage and current. Exceeding the maximum PV input voltage on a cold morning is a common cause of controller failure.
A larger array (here 12 x 450W) refills the same battery faster on short winter days.
Worked examples: essential loads vs. whole-home backup
The same four steps produce very different systems depending on what you choose to keep running.
| Essential loads | Whole-home backup | |
|---|---|---|
| What runs | Fridge, furnace fan, well pump, lights, internet | Everything, including range, dryer and central air |
| Daily energy (incl. 15% losses) | ~13 kWh | ~34 kWh |
| Peak running load | ~2 kW | ~7-9 kW |
| Inverter | 5-6 kW split-phase | 8-12 kW split-phase |
| LiFePO4 battery (1 day) | ~15 kWh | ~38 kWh |
| Solar array (4.5 sun hours) | ~3.6 kW | ~9.5 kW |
| Wiring | Critical-loads subpanel | Whole-home transfer switch or main-panel integration |
The whole-home figures assume about 30 kWh of daily use, close to the average US household. Homes with electric heat, an EV or a pool can use two to three times that.
In practice, many homeowners land in between. A common approach is an 8kW solar power system with 15-30 kWh of storage: it covers most daytime use in sunny months and keeps essentials running through overnight outages, while the heaviest loads such as the dryer and electric range are left off the backup panel.
Essential-loads systems cost far less and are easier to install, but someone has to decide in advance which circuits matter. Whole-home systems avoid that trade-off at roughly two to three times the battery and array cost.
Common sizing mistakes to avoid
- Sizing from nameplate ratings. Labels overstate average draw for cycling appliances and understate surge for motors. Measure where you can.
- Ignoring surge. An inverter that handles the running load but trips every time the well pump starts is effectively undersized.
- Sizing solar for summer only. If you depend on solar during winter outages, use winter sun hours.
- Forgetting standby loads. Inverters, routers, security systems and appliance clocks can draw 50-100 W around the clock – over 1-2 kWh a day.
- Skipping split-phase. A 120 V-only system cannot run 240 V well pumps, dryers or many HVAC units.
- Leaving no room to grow. Choosing an inverter and battery that can be expanded later is cheaper than replacing them when you add an EV or heat pump.
Quick sizing checklist
- Build a load list and total your daily kWh, plus 15-20% for losses.
- Add up the peak running watts and the largest motor surge, then pick an inverter with headroom and split-phase output if you need 240 V.
- Multiply daily kWh by days of autonomy and divide by usable depth of discharge to get battery size.
- Divide daily kWh by worst-season peak sun hours times 0.8 to get array size.
- Have a licensed electrician confirm the panel connection, transfer switch and local permit requirements before installation.
Get these numbers right on paper and the hardware choice becomes much simpler. Whether you back up a few circuits or the whole house, the system will do what you need when the grid goes down.