A DIY Powerwall is certainly worth considering if you’re one of the people rolling their eyes at the price point of the real thing.
| Details | Tesla Powerwall |
|---|---|
| Price | $10,500 |
| Energy Storage Capacity | 13.5 kWh |
| Power Capacity | 5.6 kW |
| Warranty | Ten years |
While it may look like we’re picking a fight with Tesla, we want to let Mr. Musk know that we don’t have any beef with him or his empire.
We simply believe that it’s worth exploring safe and cost-effective ways to store solar energy because providing our readers with options and autonomy is incredibly important to us!
We can’t say for sure how much you’ll be saving for this project since the cost of building a DIY Powerwall depends on a lot of factors, such as material prices and the cost of your time.
But rest assured, this will be fun for you DIY aficionados.
Now, before we go any further, be warned – this subject matter is rather advanced, so expect a lot of technical jargon to be thrown around.
We’ll try to keep things as simple as possible, but please reach out to us in the comments section if you need more clarification. We’re always happy to help out!
Table of Contents
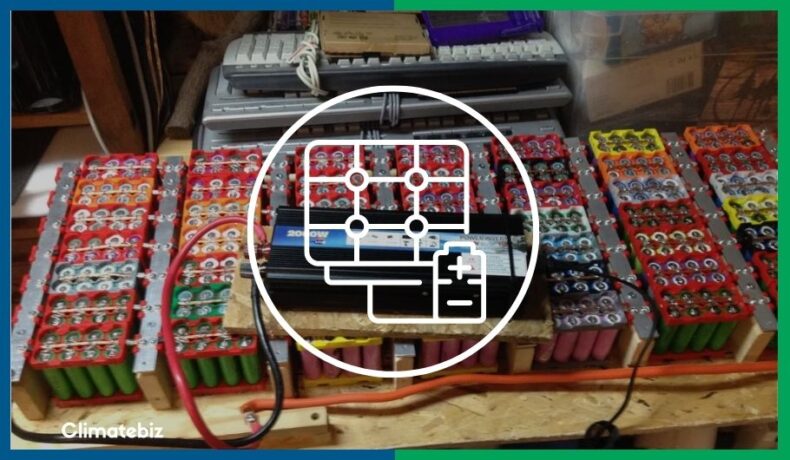
What Is A DIY Powerwall?
A DIY Powerwall is an energy storage unit that mimics an actual Tesla Powerwall at a fraction of the cost.

Source: Pinterest
Safety Considerations Before Building a DIY Powerwall
We know you’re excited to get going, but it’s essential to talk about safety before we proceed.
For reference, here are the top hazards you should be mindful of when handling batteries:
1. Battery Type
Saving money by going with the cheapest battery you can find may be tempting. However, not all battery chemistries are equal when it comes to safety.
While lead-acid batteries can be more economical, they need precise charging and discharging parameters to keep them healthy and safe.
Therefore, for this project, we strongly recommend using LiFePo4 batteries. They are superior in terms of performance to lead-acid and have safer chemistry.
However, if you’re interested in exploring alternative battery chemistries on the market today, check out our article – Top 7 Lithium Battery Alternatives (Future of batteries).
2. Voltage Mismatch And Overcharging (Overvoltage)
It would be best if you made sure that the voltage of your battery system is compatible with your entire solar generator configuration.
If you overlook this, the components of your system will likely suffer due to a voltage mismatch.
Bottom line: Make sure your batteries are plugged into a system with similar voltage. Hooking them up with a charger that has too high a voltage will most certainly damage the cells.
3. Over-Discharging
On the other hand, over-discharging is a situation where you discharge battery cells beyond the “lower safe voltage limit.” This is a potential problem in large battery packs since cells are discharged simultaneously despite differing capacities.
This situation forces the battery to adjust its voltage outside the normal range with a different state of charge (SoC). While the voltage adjustment allows the battery to keep up with the others, operating it beyond its standard rating will affect its lifespan.
4. Placing The DIY PowerWall In A Hot Environment
Make sure that you store your batteries (especially homemade ones) in a cool, ventilated place. Neglecting to do so may lead to overheating and damage.
We recommend that you store your batteries somewhere with an ambient temperature of 70 degrees Fahrenheit.
Estimating Your Power And Energy Needs For A DIY Powerwall
Estimating your power and energy needs for a DIY Powerwall is a matter of listing down the appliances you want to operate with the battery when other electricity sources aren’t available.
Planning and sizing your DIY Powerwall is not rocket science and can be summarized into four (4) simple steps:
- List down all the appliances you want to operate
- Look at each appliance’s “nameplate rating,” then add all the watt ratings.
- Estimate how many hours you want to operate each appliance
- Use the energy formula to get your total energy needs
If you need further details and guidance on these steps, we strongly recommend reading our article on RV Off-grid solar roofs.
Sample Calculations
Once you’ve finished the above steps, you should have something along the lines of the below tables.
| Typical Appliances | Power | Hours of use | Total energy |
|---|---|---|---|
| Led Lights | 50W | 6 | 300 W.h |
| Phones and tablets | 40W | 3 | 120 W.h |
| Laptop | 120W | 3 | 360 W.h |
| Fans | 120W | 5 | 600 W.h |
| Refrigerator | 120W | 24 | 1400 W.h |
| Power tool | 600W | 1 | 600 W.h |
| Led Tv | 150W | 5 | 750 W.h |
| TOTAL | 1200W | 4,130 W.h |
Using the above scenario, in a 24h home emergency power backup situation, we determined that you’ll need a total power of 1200W and more than 4kWh of energy.
Using larger appliances will increase the power and energy needs of your home’s entire network.
| Typical Appliances | Rated (Running) Watts | Hours Used | Energy needed |
|---|---|---|---|
| Small Coffee Maker | 600 W | 0.25 hours | 150 watt-hours |
| Microwave | 800 W | 0.25 hours | 200 watt-hours |
| Mini Refrigerator / Freezer | 400 W | 24 hours | 3,200 watt-hours |
| Laptop and Cellphone | 100 W | 5 hours | 500 watt-hours |
| Lightbulbs | 100 W | 6 hours | 600 watt-hours |
| Total Solar Panel Size | 2,000 watts or 2 kilowatts | 4,450 watt-hours |
When To Increase System Voltage
Running large loads on higher voltage will save you plenty of money on BMS, wires, and protection devices.
We understand that we cannot cover all possible cases when it comes to sizing your home’s power and energy needs. But our goal here isn’t to provide you with an exhaustive set of case studies. Instead, we want to assist you in doing this independently and with confidence.
Tools and Components Needed To Build A DIY Powerwall
Now, here’s a list of the essential tools and components you’ll need to build a DIY Powerwall:
- Voltmeter/Multimeter
- Battery
- Cable Wires
- Protection System
Voltmeter/Multimeter
A multimeter is a measuring instrument that can measure electrical properties such as voltage, resistance, and current.
Battery
These components will be grouped together to form your DIY powerwall. You will connect them in series (and parallel if necessary) to match your desired voltage and capacity.
| Brand | Voltage | Energy Capacity | Description |
|---|---|---|---|
| Ampere Time LiFePO4 Deep Cycle Battery | 12V | 100Ah | with Built-in BMS |
| Ampere Time LiFePO4 Deep Cycle Battery | 12V | 200Ah | with Built-in BMS |
| ECO-WORTHY | 12V | 50Ah | with Built-in BMS |
| ECO-WORTHY | 12V | 24Ah | with Built-in BMS |
| Renogy Smart LiFePO4 w/ Self-Heating | 12V | 100Ah | Self-heating function Auto-Balancing |
Do keep in mind that the batteries we have mentioned in the above table are not individual battery cells, but instead ready-made batteries sold by popular brands.
While it is possible to build a DIY powerwall with ready-made solar batteries connected in series, it may make more sense to source individual cells in order to capitalize on saving space and design.
We recommend checking out Alibaba to source individual LiFePO4 cells.
Cable Wires
Electrical wire size depends on the total load amps and wiring length.
For most applications, 4AWG should do the trick. The most crucial information is the maximum amps you will be using at any time.
Safety Devices
To address the aforementioned safety hazards, you need to invest in protection systems.
In the world of electrical engineering, we have what you call “protection systems” such as relays and circuit breakers. When put together, these pieces of equipment monitor current voltage. If a harmful incident does happen, the protection system isolates parts of the network to protect expensive equipment from severe damage.
Therefore, you’ll need two primary protection devices: a battery management system (BMS) and a battery protector.
A BMS monitors and controls the SoC of all the battery cells, while a battery protector disconnects batteries from the solar system whenever the lower voltage limit is reached.
When purchasing a battery, see if BMS and battery protections are included as features.
Build Your DIY Powerwall (Step-By-Step Instructions)
1. Check The Voltage Of Each Cell

Source: architecturelab
After buying your battery cells, you have to ensure they are correctly rated.
If any of the cells have a different voltage (more than 5% deviation from the rated voltage), connect them in parallel with another cell that has the proper voltage.

Source: battlebornbatteries
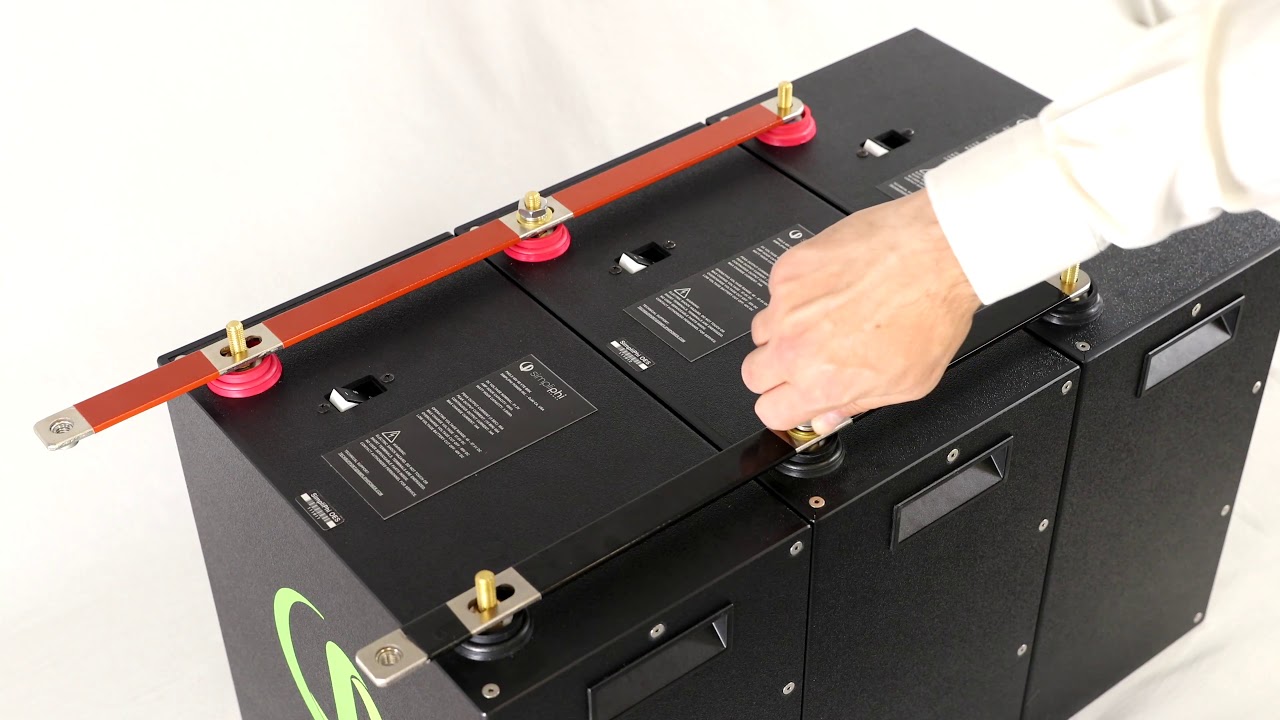
Source: SimpliPhi Power
2. Connect The Batteries Together
Now, depending on your system voltage (12V or 24V), you want to connect your battery cells in series, then parallel (if necessary).
If you’re not too familiar with wiring components in parallel and series, check out our article – How To Wire Solar Panels (An Expert Guide).
Here are some tips when connecting batteries together:
- Clean the individual battery cells first.
- Arrange each cell in opposite polarities (the “-” and “+” markings) to one another to make the whole battery compact (see image below).
- Group them together using adhesives (double-sided tape/electric tapes) or hose clamps.
- As much as possible, keep all connections limited to series ONLY.
The actual connections can be made using cables or busbars.
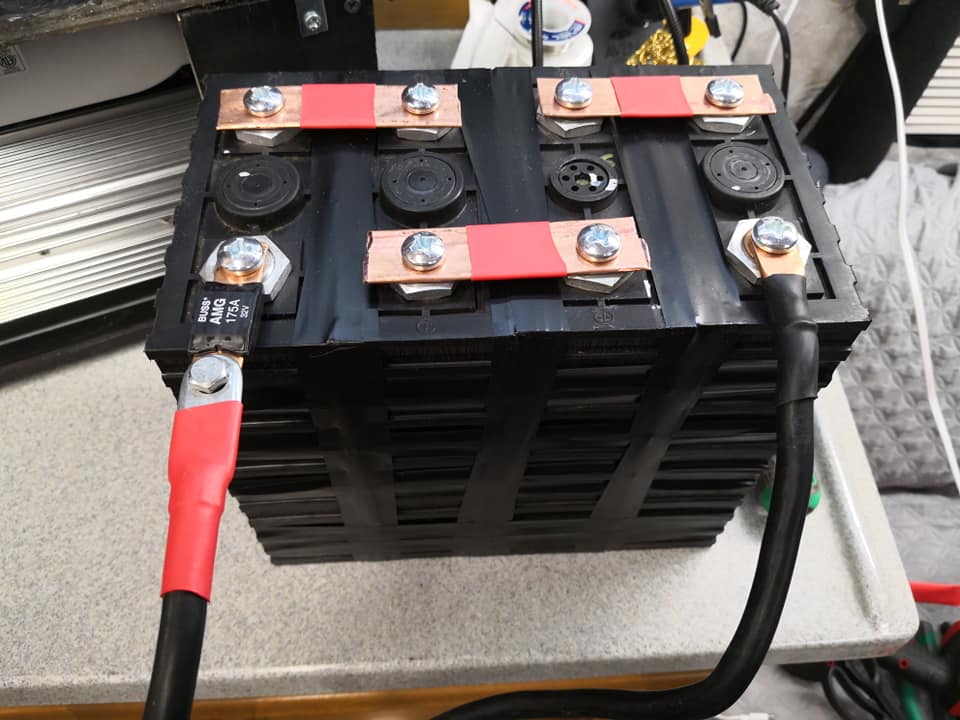
Source: mobile-solarpower

Source: mobile-solarpower
3. Balance Your Battery Cells With A Cell Balancer
One of the inherent characteristics of poorly made battery units is that each cell may have different internal resistances even though they look identical.
So, what’s the problem here?
Having different internal resistances causes each cell to charge/discharge more/less than the others. This poses a problem if neglected long-term since it would mean you’re letting a couple of cells in the DIY PowerWall overwork to match the behavior of its fellow cells.
The remedy for this concern is to balance your cells twice:
- Initial cell balancing
- Bottom-balancing
These two processes are almost similar except that you match all your battery voltages at a low SoC when doing bottom-balancing (hence the name).
There is no need to bottom balance cells for months, even years if done right.
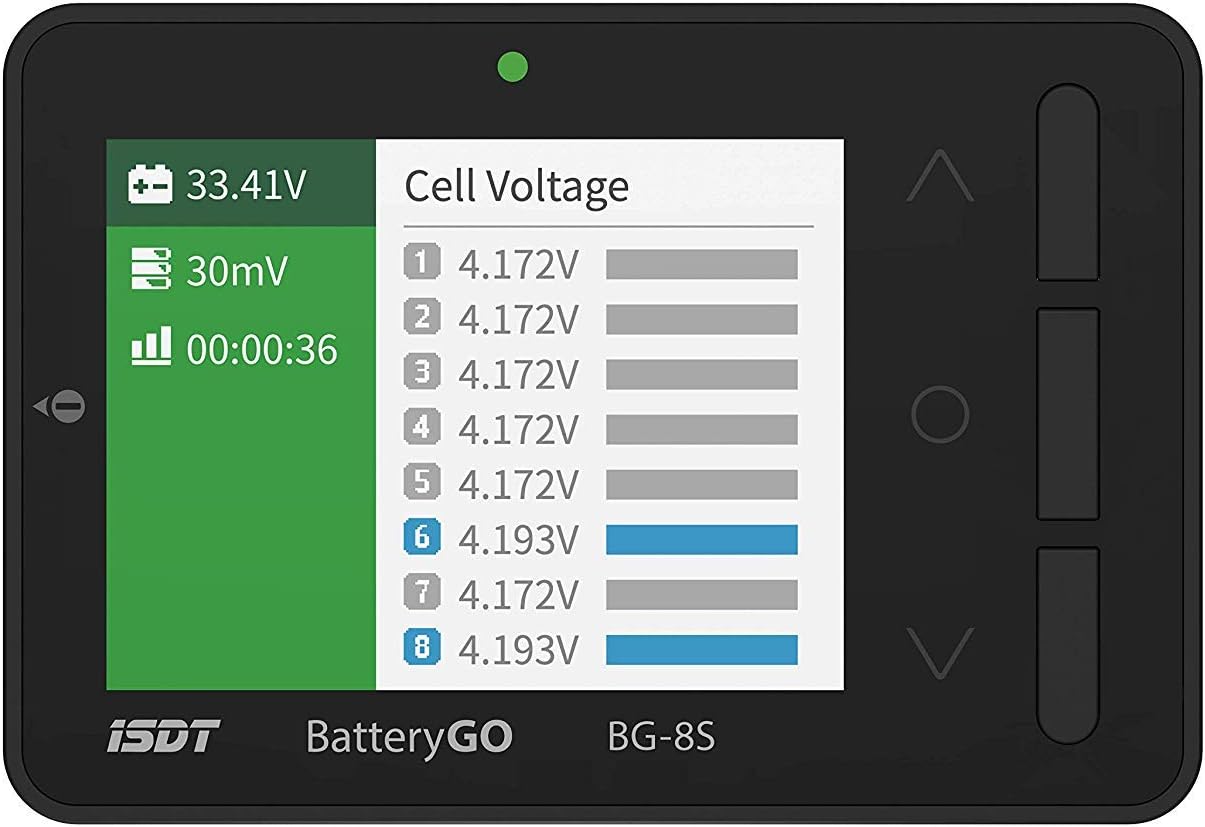
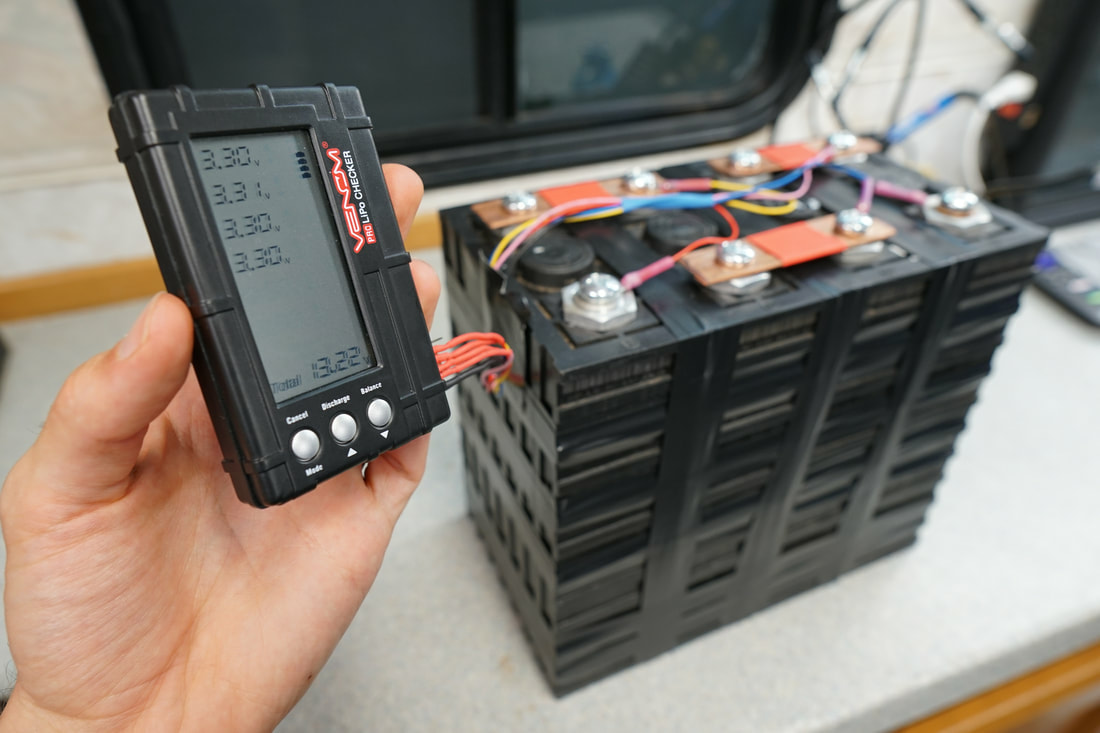
3.1 Add A Cell Balancer
To get started, you want to initially balance all your battery cells to ensure they are uniformly calibrated.
You need to install a cell balancer with a plug cable. Using a cell balancer allows you to see the initial voltage of each battery and balance them.
The number of cables you need depends on how many cells you work with.
View price on Amazon

View price on Amazon
To do this, connect the balance lead to the negative terminal of the first cell, then connect the other wires to the positive terminals of subsequent batteries. (e.g., the second wire connected to the positive terminal of the second cell, third wire to third cell positive terminal).
Then once you operate your cell balancer, it should balance all the cell voltages.
Source: www.mobile-solarpower.com
3.2 Bottom-Balance the Cells
Great, next we bottom-balance.
First, you need to connect your battery to a load then discharge all cells to 20% capacity while watching the balance of the cells.
Once you reach the desired voltage of the battery in a nearly depleted state, balance the cells with your cell balancer.
Next, charge the 12V battery up to 13.3V (26.6V for a 24V battery). Then, check the cell voltages and make sure they stay close (within .05 volts) to each other.
Lastly, as a final check, discharge the battery again and watch the balance of the cells. They should still have nearly equivalent voltages.
Final Thoughts
That was a lot to take in, but we hope we gave you valuable information on building a DIY Powerwall.
We imagine that this project is part of a bigger plan like a DIY Solar Generator. We do have an article on that, but we suggest you grab a cold beer and celebrate for now. You made substantial progress today. Cheers, friend!